You will need:
A food processor
Canned garbanzo beans
Tahini paste*
Garlic
Olive oil
Lemon juice
Water, salt, and pepper
*If you do not have tahini paste, substitute peanut butter. Real peanut butter, the kind where the ingredients list consists of peanuts, and possibly salt. Thin it with a little sesame or olive oil and the taste will be virtually identical to the tahini paste. It will, however, set off nut allergies where tahini will not. This is VERY important (d'oh!)
In the food processor, combine one can of drained garbanzo beans, about two tablespoons of tahini paste, minced or powdered garlic as desired, and a couple of droozles of olive oil. Blend until smooth, at which point you will be able to determine how much water to add to give it a proper consistency. Add in lemon juice and then gradually add salt and pepper to taste.
If you like, consider adding roasted red pepper or black olives to the mix, or separate your blend into sections and do all three types.
Eat with pita chips, which are also quite easy to make.
You will need:
Baking sheets
Pitas in abundance
Olive oil, preferably in a spray bottle or squirt bottle
"Italian seasoning" spice
Kosher salt
Cut the pitas into wedges, and separate the sides. With the insides up, lightly coat with olive oil, then sprinkle spices and salt on top. Bake at 300º for ten minutes or less, when chips are golden brown. Experience tells me that a darker brown is still tasty but rougher on the teeth.
Monday, October 31, 2005
Sunday, October 30, 2005
Not a Middle Eastern Dish
The other night, I was hungry. When I get hungry, I don't think so well. I knew we had plenty of ingredients on hand but I wasn't quite sure how we should put them together. (I had been thinking we were going to have burritos, but the pack of tortillas was one short!)
So I asked Rob, and he came up with the following:
Couscous (1 box)
Half of a small tube of sausage
Bouillon cube (chicken in this case)
Onion
Olive oil
In a microwaveable dish, put the amount of water required on the box of couscous. Drop in the bouillon cube; float some olive oil on top. In general, coucous comes with a spice pack so stir that in as well. (If it does not, you'll want to add in a little salt and pepper— lemon pepper's a pretty good blend— and maybe a few other pork-friendly spices of your choice.) Microwave the water until just boiling, then dump in the couscous and cover.
Slice up about a quarter of a yellow onion and drop it in with the sausage. Fry until cooked, then stir in to the couscous. Serve immediately.
It occurs to me that you could do quite well by throwing in some sliced green apple. Or perhaps roasted red pepper or cooked tomatoes. Mmmm.
Serves two very hungry people or more moderate appetites of four.
Saturday, October 29, 2005
Snickerdoodle Drink
I don't believe I've posted this before. It's the sort of thing you come up with when you work in a café and you're really, really bored.
You will need:
Milk
Chocolate syrup, dark for preference
Vanilla syrup
Almond syrup
Cinnamon
Nutmeg
Whipped cream
I made this with a steamer wand. You can heat the milk in the microwave but be very very careful to not boil it.
Heat the milk until just shy of boiling. Add in chocolate syrup until the color is nice and dark. Yes, you can make this with hot chocolate mix but it isn't as good and is often too sweet. Then you add 1/2 measure of vanilla syrup— this varies by brand, so a "measure" is what you'd put into a drink to make a flavored latte— and 1/4 measure of almond syrup. Stir in some cinnamon and nutmeg, then top with whipped cream and dust that with cinnamon.
And by the way... don't make this with skim. You're only fooling yourself if you do.
Friday, October 28, 2005
Danish Puff Coffee Cake
You will need:
bottom—
1 cup flour
1 cube butter or margarine
2 tbsp. water
1/4 tsp. baking powder
top—
1 cup water
1 cube butter or margarine
1 tsp. almond flavoring
1 cup flour
3 eggs
glaze—
1 1/2 cup powdered sugar
2 tbsp warm water
1 tsp. almond flavoring
Bottom: Cut butter into 1 cup flour and baking powder until well blended. Sprinkle with water; mix with fork (or pastry blender.) Divide in half; pat dough into two long strips, 3x12 inches, on ungreased cookie sheet 3 inches apart.
Top: Combine water and butter; bring to a boil. Add flavoring and remove from heat. Quickly beat in the flour with an electric mixer. Make sure there are no lumps. Add the eggs one at a time, beating vigorously after each.
Cover your pastry strips with this mixture, spreading over the sides and ends. Bake about 60 minutes at 375º until crisp and golden brown.
Glaze: Mix it; spread on the coffee cakes while they are warm. Sprinkle with chopped almonds if so desired.
Thursday, October 27, 2005
Frikadeller
I should mention that while my mother-in-law has this lovely meatball recipe, her usual method of making meatballs is to go to the frozen food section of the supermarket and get the Armour brand.
You will need:
1 lb. lean ground beef
1/2 lb. lean ground pork
1/4 cup flour
1 tsp. salt
1/2 tsp. pepper
1 small grated onion
2 eggs
1 cup milk
4 tbsp. butter or margarine
Mix the first six ingredients. Add eggs, milk, and butter. Form into eight patties [I thought these were meat BALLS] and fry in butter until brown. Turn down the heat; cover and cook for another half hour.
This goes really well with mashed potatoes.
Wednesday, October 26, 2005
Aebleskivers
My recent trip to Oregon featured a breakfast of the all-too-addictive aebleskivers. They're little sweet pancake-waffle balls that you break open and serve with jam, a legacy of Junction City's Scandahoovian heritage.
I asked my mother-in-law for the recipe, and she replied that a certain church cookbook she'd given me had the recipe. So I got home, had a look, and went to my husband to ask "which one?" After he'd stopped laughing (because how many places would have a single church cookbook featuring more than one version of an obscure recipe?) he told me his mother probably used neither of them, but her own arcane style. So here's a combined version of the recipe, with some notes along the way.
You will need:
An aebleskiver pan (which has seven semi-circular depressions in it.) This has to be a heavy-duty pan as a cheap pan will cook unevenly.
All recipe variants denoted by / ; use either the ingredients before the slash, or the ones after, not both.
2 cups flour
2 cups milk/2 cups buttermilk
2 tsp. baking powder/1 tsp. baking powder and 1 tsp. baking soda
1/4 tsp. salt/1/2 tsp. salt
2 eggs, separated/3 eggs, separated
1 tbsp. sugar/2 tbsp. sugar
1/2 tsp. almond flavoring/applesauce
Melted butter or shortening
Beat the egg whites until stiff. Beat the yolks, then add sugar, salt, and milk/buttermilk. Add the flour, almond flavoring, and baking powder/soda. Fold in the beaten egg whites.
Heat the aebleskiver pan until hot. Drop some butter/shortening into each depression and fill 2/3 full with batter. The second recipe requires you to drop some applesauce onto the dough (carefully). As bubbles form in the balls (like with pancakes), turn with a knitting needle or fork. Keep turning until aebleskiver is spherical and brown on all sides; if you are using the knitting needle you can use it to test for doneness.
Serve hot, with maple syrup, powdered sugar, or by breaking it open and filling it with jam. Very addictive.
Rob notes that this is essentially a fancy soft waffle, so if you'd like to experiment, try a waffle mix and cut down the wet ingredients (water & oil) by a third, substitute some applesauce, or add some sugar.
Or just go to Junction City's Scandanavian Festival, held every August, and buy the danged things.
And because you're all dying to know, it's pronounced "Ay-ble-skee-ver."
[Comments copied from old blog]:
Alena made this comment,
I bought a pan that I have been told is an aebleskiver but it isn't round at the bottom, it is flat, but round edges. In other words, it would make more of a pancake shape than a donut hole shape. It is only (at most) 1/2 inch deep. Is it still an aebleskiver pan?
Bernadette made this comment,
Probably not, but you could make silver dollar pancakes in it with the aebleskiver recipe and I bet it would still taste good!
Stephanie made this comment,
hello, my family is from denmark and Aebleskivers have always been something that we've always eaten. the more traditional Aebleskiver is the first one that was post without buttermilk and instead of 2 eggs, use 3 eggs and we also use 1/4 tsp. almond flavouring and 1/4 tsp. pure vanilla extract, no imitation though! another thing i noticed is the recipe doesn't say to put melted butter in the recipe... i always put 4 tbsp. of melted butter in my batter, and i also put butter inside the Aebleskivers when they are done with either blackberry preserve or raspberry preserve. so, try it with the extra egg and the almond and vanilla and the 4 tbsp. of melted real butter, no margarine! one last thing, the recipe doesn't say to quarter turn the aebleskivers, when i was a kid my mother would let me turn and the first time i tried i had tried turning all the way over and not quarter turning and they didn't turn out right... so, now you quarter turn and make sure you do it about 20 seconds after they go into the hot pan, you don't want to wait too long or there won't be enough batter that is still wet to go all the way around in each quarter turn. :) if you want to let me know how they turned out, or if you have questions or anything, you can email me at stephie_pie@hellokitty.com
Monday, October 24, 2005
Bernadette's Perfect Cranberry Sauce For Those Who Think They Hate It
I am always surprised when I find out how many people don't like cranberry sauce. They've usually only been exposed to the canned variety, which I like anyway, but which is kind of boring all by itself. They also don't seem to realize that it is called cranberry sauce for a reason, and that it is meant as a spread for turkey. (It works especially well with slightly dry turkey.) Anyway, the recipe for basic cranberry sauce is appallingly simple, and goes like this:
1 cup water
1 cup sugar
1 12oz. pkg of cranberries
Put water and sugar in a saucepan and bring to a boil. Add cranberries and reduce heat to low boil; cook until all of the cranberries have popped, stirring gently. Cool before serving.
That's it. That's everything. That's all that silly canned stuff is: sugar, water, and cranberries. If you want a jellied version, you strain it while it's warm and you're done.
That's just screaming out for improvement...
I've been playing around with this for years, and have come up with a modular version that you can adjust to suit your family's tastes. My own version is listed below, and is perfect for those who think they hate cranberry sauce for one reason:
They've told me so.
Liquid group:
Filtered water
Orange juice
Cranberry juice
Raspberry juice
Pomegranate juice (only use as one quarter of the liquid amount; other three quarters should be water or other liquid)
*Apple juice
Sugar group:
White sugar
Brown sugar
Natural sugar
Honey
Molasses (use sparingly)
Fruit group:
Cranberries (use full amount)
Mandarin bits
*Apple bits
*Dark Raisins
Spices:
Cinnamon
Nutmeg
Allspice
*Cloves
*Ginger
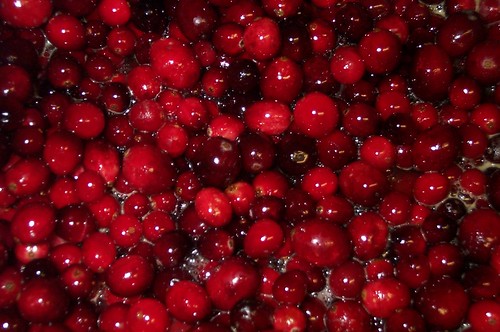
Follow the above recipe with the liquids making a total of one cup, the sugars making one cup (go easy on the honey, though), and the fruit bits tossed in as extras to the cranberries. Dust with the spices of your choice. To keep the cranberries from splattering all over your stove, gently pop them with the back of the spoon against the side of the pot.
The *starred ingredients go together but not with the other ingredients. Don't go mixing apples and oranges.
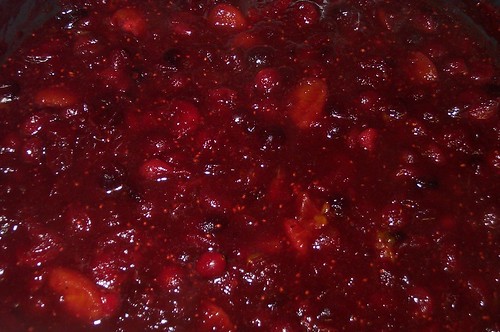
My personal recipe is a double amount; one cup water, one cup orange juice, one cup white sugar, 2/3 cup brown, various squirts of honey and molasses, two packages of cranberries, lots of cinnamon and a couple of dashes of nutmeg. Mandarin sections added as available; remove as much pith as humanly possible. Like I said, I've had people tell me they hate cranberry sauce but like mine, so take that as you will. I personally eat the leftovers for breakfast. And on waffles. Mmmm. Cranberry waffles.
Anyone who says you should use salt or pepper (!) is a heathen.
This year I'm making it for my work, as well as for my family. More leftovers for me!
1 cup water
1 cup sugar
1 12oz. pkg of cranberries
Put water and sugar in a saucepan and bring to a boil. Add cranberries and reduce heat to low boil; cook until all of the cranberries have popped, stirring gently. Cool before serving.
That's it. That's everything. That's all that silly canned stuff is: sugar, water, and cranberries. If you want a jellied version, you strain it while it's warm and you're done.
That's just screaming out for improvement...
I've been playing around with this for years, and have come up with a modular version that you can adjust to suit your family's tastes. My own version is listed below, and is perfect for those who think they hate cranberry sauce for one reason:
They've told me so.
Liquid group:
Filtered water
Orange juice
Cranberry juice
Raspberry juice
Pomegranate juice (only use as one quarter of the liquid amount; other three quarters should be water or other liquid)
*Apple juice
Sugar group:
White sugar
Brown sugar
Natural sugar
Honey
Molasses (use sparingly)
Fruit group:
Cranberries (use full amount)
Mandarin bits
*Apple bits
*Dark Raisins
Spices:
Cinnamon
Nutmeg
Allspice
*Cloves
*Ginger

Follow the above recipe with the liquids making a total of one cup, the sugars making one cup (go easy on the honey, though), and the fruit bits tossed in as extras to the cranberries. Dust with the spices of your choice. To keep the cranberries from splattering all over your stove, gently pop them with the back of the spoon against the side of the pot.
The *starred ingredients go together but not with the other ingredients. Don't go mixing apples and oranges.

My personal recipe is a double amount; one cup water, one cup orange juice, one cup white sugar, 2/3 cup brown, various squirts of honey and molasses, two packages of cranberries, lots of cinnamon and a couple of dashes of nutmeg. Mandarin sections added as available; remove as much pith as humanly possible. Like I said, I've had people tell me they hate cranberry sauce but like mine, so take that as you will. I personally eat the leftovers for breakfast. And on waffles. Mmmm. Cranberry waffles.
Anyone who says you should use salt or pepper (!) is a heathen.
This year I'm making it for my work, as well as for my family. More leftovers for me!
Sunday, October 23, 2005
Blame It On the Vinaigrette Salad Redux
Last year, I created a recipe called Blame It On the Vinaigrette Salad. Since then I've had the chance to refine it, and so the newly perfected recipe needs to make its debut.
You will need:
Spinach leaves
Bell pepper (I prefer yellow, red, or orange; check what is in the best shape in the produce dept.)
Celery (optional)
Mushrooms (optional)
Tart green apple (such as Granny Smith)
Green onion
Pomegranate seeds in season OR dried cranberries (cherry or orange flavors work well)
Crumbled feta cheese (vitally important to keep the salad from being too bitter)
Walnuts
Raspberry -Walnut Vinaigrette
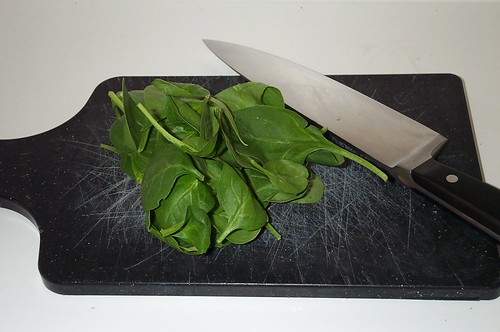
Chop
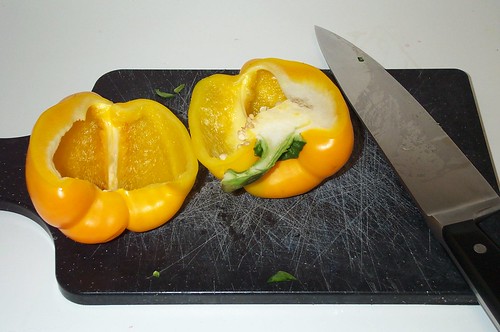
Cut
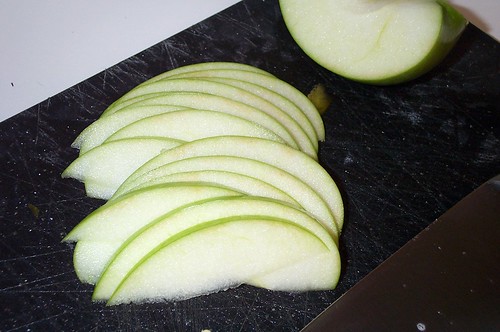
Slice
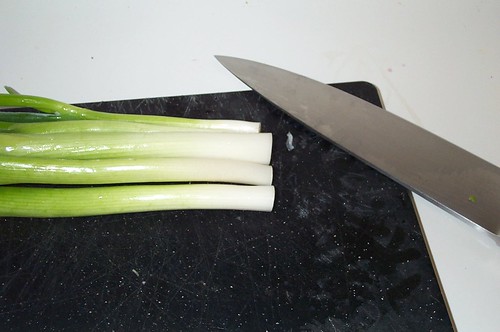
Add
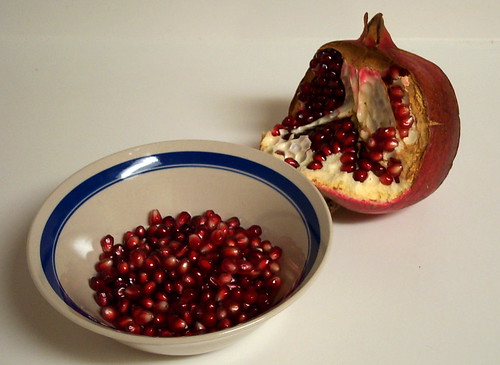
Seed
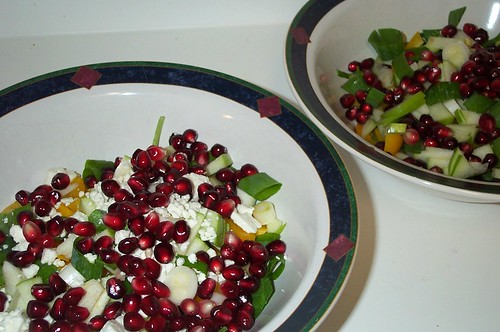
Needs walnuts
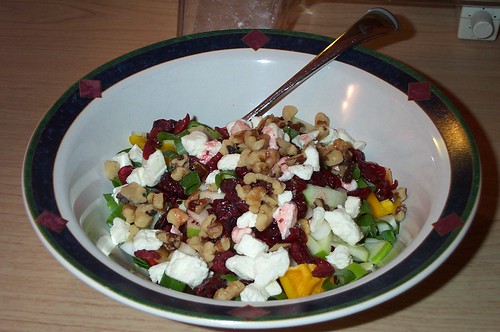
Alternate variety with cranberries.
You will need:
Spinach leaves
Bell pepper (I prefer yellow, red, or orange; check what is in the best shape in the produce dept.)
Celery (optional)
Mushrooms (optional)
Tart green apple (such as Granny Smith)
Green onion
Pomegranate seeds in season OR dried cranberries (cherry or orange flavors work well)
Crumbled feta cheese (vitally important to keep the salad from being too bitter)
Walnuts
Raspberry -Walnut Vinaigrette

Chop

Cut

Slice

Add

Seed

Needs walnuts

Alternate variety with cranberries.
Saturday, October 22, 2005
Smoooooothie
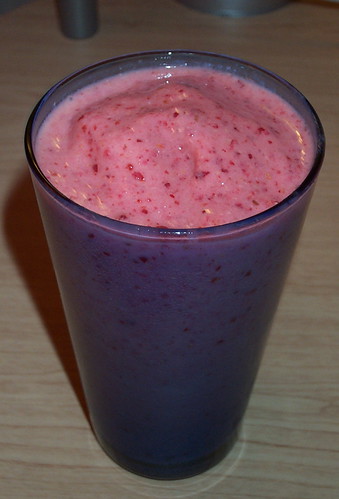
New blender means new opportunities. Judging from the prevalence of beverage bars with whipped drinks, smoothies are the most popular game in town.
The rules of the game are simple:
1. Make sure your blender can handle ice. The smell of burning machinery is very unappetizing.
2. Always, always, always put the liquid in first. This also helps to keep the machinery death away. (Though perhaps a $400 blender from Blendtech wouldn't do that, it's still a good idea. Yes, that price would be worth it. That's a VERY good company.)
3. A quick rule of thumb— which may need a little tweaking— is to have enough liquid (and binders) to fill your glass halfway, and then enough loose ice cubes to fill your glass completely. Obviously, this breaks down when you don't have pre-mixed concentrates to work with, but it's a good fudge factor.
Then all you need is a little imagination. I've been experimenting, and here are a couple of recipes I've been playing with.
Berry Smoothie
You will need:
1/2 cup orange juice
1 single serving berry or cherry yogurt
Frozen strawberries or raspberries (frozen cranberries are optional)
1 tsp wheat germ (optional; good for helping to lower cholesterol)
Dump the ingredients in the blender in the order given; pulse blend on high until smooth. (The frozen berries are in lieu of ice, and work very well.)
Black and Blue Smoothie
for those days when you've banged your elbow and stubbed your toe
You will need:
1/2 cup lemonade, or water and lemon juice
1 single serving of blueberry yogurt
Frozen blackberries (frozen nectarines or skinned peaches optional)
1 tsp wheat germ (optional)
Again, blend in the order given. Add frozen berries if it seems too thin. It is best to always go from thin to thick; most blenders won't blend in new liquid very well.
Mocha Smoothie (approximate; I don't drink coffee)
You will need:
1/2 cup strong coffee or two shots fresh espresso
4 oz. milk (about one glug, or if using an espresso machine, top off the shot)
1/2 single serving plain or vanilla yogurt (if you have yogurt powder, substitute 1/4 cup and add it last)
16 or 20 oz. glass of ice
Chocolate syrup
Ground cinnamon (optional)
The amount of chocolate necessary is dependent upon you. The cinnamon is good for drawing the bitterness from coffee. (The things you learn as a barista.)
Friday, October 21, 2005
Orzo Salad
My sister served this salad to us this summer, and I have been dutifully begging for the recipe ever since.
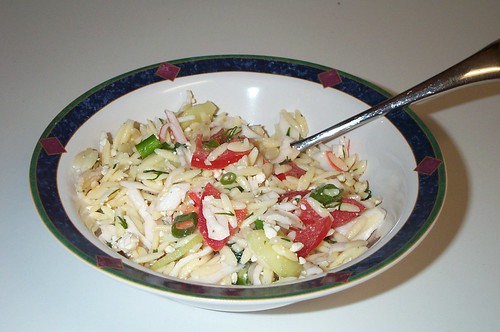
You will need:
1 & 1/2 boxes orzo
1 & 1/2 bunches green onions, chopped
3/4 lb feta cheese, crumbled
3/4 cup chopped fresh dill
7 tbsp fresh lemon juice
6 tbsp olive oil
3 lbs uncooked medium shrimp, peeled, deveined, or 2 lbs imitation crab
1 & 1/2 English hot house cucumbers, quartered lengthwise, cut crosswise into 1/4 in pieces (regular cucumbers can be substituted)
2 baskets cherry tomatoes, halved
1/2 hot house cucumber, sliced into rounds
Fresh dill sprigs
Cook orzo in large pot of boiling salted water until just tender, about 10 minutes. Drain. Rinse with cold water to cool; drain well. Transfer to large bowl. Add green onions, feta cheese, chopped dill, lemon juice and oil; mix well. Cook shrimp in large pot of boiling salted water until pink and just cooked through, about 2 minutes. Drain, rinse with cold water to cool; drain well. Mix into salad. Season to taste with salt and pepper. (Can be prepared 8 hours ahead. Cover and refrigerate.)
Mix cucumber pieces and 3/4 of cherry tomatoes into salad. Transfer to clean large bowl. Arrange cucumber slices and remaining chery tomato halves around edge of bowl. Garnish salad with dill slices and serve.
Thursday, October 20, 2005
Hummus
Gah! Before you know it, life catches up and leaves you behind on entries!
Oops.
Well, I've been craving hummus lately. It's quite tasty, you know. My favorite is Trader Joe's version with their pitas... but since this is a recipe, perhaps I should tell you how to make it, hmmm?
Via Cooking.com
You will need:
1 3/4 cups garbanzo beans (chickpeas)
6 cups water
3 garlic cloves, peeled
1 1/4 cups tahini paste
1 teaspoon dried cumin
1 teaspoon chili powder (or to taste)
1/3 cup lemon juice
2 tablespoons olive oil
Pita bread, cut into wedges
Wash garbanzo beans (chickpeas) and soak in cold water for 24 hours. (Obviously, canned garbanzo beans will not need this preparation step.) Place garbanzo beans, with their soaking liquid, in a large saucepan and bring to a boil. Simmer for 2 hours, skimming off any debris that may surface. Drain garbanzo beans, reserving 1/4 cup liquid, and refresh in cold water.
Process until smooth. Add garlic, tahini, spices and salt, lemon juice and olive oil. Reprocess and adjust seasoning. Serve drizzled with additional olive oil with pita wedges.
Personally, I just spread the pita with hummus and eat it like a pizza.
Wednesday, October 19, 2005
Cornish Pasty
British food is sometimes unfairly maligned. Partly that is because many of the basic British meals were incorporated into American cuisine (such as eggs and bacon, or sandwiches) and sometimes because the names just sound funny.
Cornish pasties are the simple, filling meals that laborers used to take to their jobs. I encountered pasties again at the Renaissance Faire and decided I had to both look it up and share with everyone. The following recipe is a conglomerate of the many recipes I encountered on my search.
For the crust, you will need:
4 cups plain flour
1 1/2 cups butter or lard (or shortening)
1/8 tsp salt
8-10 tsp water
Mix butter and flour until rough lumps form. Add salt; gradually add water until dough forms ball. Put aside in cool place.
Or do the shortcut, frozen pie crust. Turn the crust over on waxed paper; remove tin as soon as it releases from dough. Let it thaw and flatten gently.
For the filling, you will need:
Beef— ground beef, chuck steak, round steak, any except stew beef
Raw potato
Raw rutabaga or carrot or celery or mushroom
Small onion
Parsley or green onion (optional)
Salt and pepper
Bouillon cube (optional)
Butter
Cut meat into small pieces. Slice potatoes and other vegetables into small pieces no more than 1/2 inch across; dice onion finely. Roll out dough to 1/4 inch thick, cut out circles and moisten edges. Layer vegetables, then meat; repeat but do not overfill (or you get what happened to me, a messy pasty. Oh well.) Sprinkle with spice (and bouillon if using), dot with butter.
Fold the pasty and crimp the edge (mine got away from me). Brush with egg. Bake at 400º for 15 minutes, then lower to 350º and bake until golden— 10-15 minutes if small and up to 40 for large pasties.
Pasties, of course, have a large variance in fillings. I've seen it suggested that you try chicken, or parsley, shallots, spinach, egg, and bacon, or even the traditional pie apples and brown sugar. On site even suggested having a savory side and a sweet side, marked so that you can eat from dinner to dessert in one pasty. (If you do that, make sure the two sides go together, such as sausage and potato with apples and cinnamon.) Once you get good at them (I'm not), you can prebake them and wrap them up to take to work.
That is what they're designed for, after all.
Tuesday, October 18, 2005
When Couscous is Not Enough
The other day I really felt like having some couscous, but I was hungrier than that. I wanted meat, darnit. So here's the simple recipe I came up with to fulfill both longings.
You will need:
1 pkg couscous (listed at three servings); I used Garlic and Olive Oil blend, plus required ingredients for that.
1/4—1/3 lb ground beef
Green onion
Bouillon cube (about 1/3) or 'seasoned salt' with MSG
Salt and pepper to taste
Prepare couscous according to package directions after adding bouillon cube. (If you're worried about salt intake, leave out the bouillon cube and replace the required water with low-salt chicken, beef, or vegetable broth.)
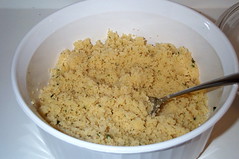
Chop some green onion into a frying pan with the ground beef;
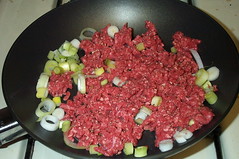
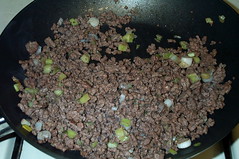
fry over medium heat, stirring constantly, until browned and the fat is cooked away.
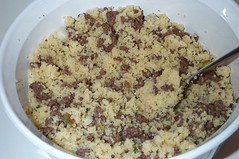
Fluff the couscous and stir in the meat;
garnish with chopped green onion.
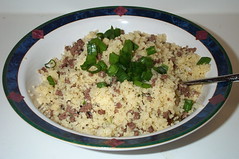
Serves 2-4 or one teenaged boy.
Consider cucumbers as a somewhat traditional side dish. Cucumbers with "greek" yogurt is the most authentic, but I'll let you get away with ranch dressing... as long as it's made from the mix packet and not from a bottle.
You will need:
1 pkg couscous (listed at three servings); I used Garlic and Olive Oil blend, plus required ingredients for that.
1/4—1/3 lb ground beef
Green onion
Bouillon cube (about 1/3) or 'seasoned salt' with MSG
Salt and pepper to taste
Prepare couscous according to package directions after adding bouillon cube. (If you're worried about salt intake, leave out the bouillon cube and replace the required water with low-salt chicken, beef, or vegetable broth.)

Chop some green onion into a frying pan with the ground beef;

fry over medium heat, stirring constantly, until browned and the fat is cooked away.

Fluff the couscous and stir in the meat;

garnish with chopped green onion.

Serves 2-4 or one teenaged boy.
Consider cucumbers as a somewhat traditional side dish. Cucumbers with "greek" yogurt is the most authentic, but I'll let you get away with ranch dressing... as long as it's made from the mix packet and not from a bottle.
Monday, October 17, 2005
Sammich
I know you all are familiar with how to make a sandwich. I'm only posting this recipe because I just finished having one and it WAS SO GOOD that I had to share it with you.
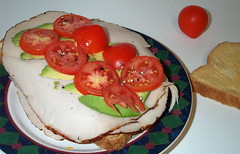 Yes, those are cherry tomatoes; that's what I had.
You will need:
Two slices of sourdough bread
A toaster
Mayonnaise
Dijon (or deli) mustard
Deli-sliced turkey (or leftover roasted chicken)
Tomato
Cheddar
Avocado (about 1/4 of one)
Salt
Pepper
Lettuce leaf (optional)
Okay, how hard is this, anyway? Toast the bread lightly, then spread with the spreadables, layer with the turkey, slice the cheese, tomato, and avocado and layer that, then lightly dust with salt and pepper.
So—very—good.
Sunday, October 16, 2005
Plain Old Pasta
Most people these days have gone through a few "poor times" when the choice of meal was peanut butter sandwiches or ramen. You can get ramen at eight for a dollar on sale— for as long as you can stand it.
However, just because it's inexpensive doesn't mean it has to be horrible. The perfect pasta is inexpensive as well as long-lasting, a cupboard staple that I've never quite left off loving.
You will need:
A BIG pot. Even— dare I say it— a pasta pot.
Pasta of your choice; I prefer thin spaghetti or wacky mac multicolored pasta
Salt
Pepper (optional)
Parmesan or Romano cheese*
Olive oil (optional but highly recommended)
Oregano (optional)
*This is one of the few grocery items where I will not compromise. If you MUST get dried parmesan, get Kraft, since the generic brands are nasty. However, I have found that both for amount and for cost, fresh parmesan is far cheaper than dried, and when tightly wrapped in plastic wrap, will last for months. (Though I will admit that I haven't wrapped it and just left it in the fridge; that's months with regular use until used up.) Months of two or three pasta meals a week for under $10. There's no beating that cost.
The first thing that you do is fill your pot with water, about an inch and a half below the rim. I know that cooking directions say that certain amounts of pasta need certain amounts of water; I am telling you to always err on the side of too much water. Extra water does not hurt the pasta. Boil the water over high heat. There is only one reason to put oil in your pasta water and that is to keep frothing down. A simpler way to keep it from boiling over is to turn the heat down when it starts to boil.
Add your pasta. If you don't know how to measure a proper amount of spaghetti, a typical serving is between a nickel diameter's worth and a quarter diameter's worth (if you're really hungry.) You get better with practice. Add in an indeterminate amount of salt— again, don't worry about adding too much, chances are you'll pull back long before it becomes a problem.
Now here's the pasta secret: You can only tell if it's done by tasting it. Don't throw it against a latex surface, because a) that's gross and b) that's a standard of doneness that went with the era where "bland" was a good description. The cooking time listed on the package will give you a general guideline, but you're going to have to eat some. You're looking for al dente, which means "to the tooth", which is darned near impossible to describe but in reality, you want to have pasta that isn't crunchy but still has to be chewed. If it's sludge, that's unappealing and you've gone too far.
When the pasta is cooked, drain it through a colander and serve it into bowls immediately. (I have learned over the years that plates and pasta are an unnecessary combination. We have several large shallow bowls that are perfect for this sort of thing; a lot of modern stoneware has wide salad bowls that are ideal.) Drizzle some olive oil over the pasta and toss it; add pepper and oregano to taste and toss. Then grate your parmesan with a fine grater over the top— it doesn't take a whole lot— and, once again, toss. Then eat.
If you are a smart shopper, this is a meal that is literally a couple of quarters per person. A little more than ramen, true, but infinitely preferable.
Saturday, October 15, 2005
Chocolate Bread Pudding With Spiced Cream
My sister-in-law, Niki, sent this recipe along. I think I confused her when I said it tasted like a soggy good brownie; I meant that "soggy" as a description, not a slam. (I still haven't come up with a better way to put it because "moist" doesn't even begin to come close, and yet "soggy" sounds, well, wrong.)
For the pudding, you will need:
1 tsp unsalted butter
2 cups half and half
2 cups semisweet chocolate chips, about 1 pound
4 large eggs
1 cup firmly packed light brown sugar
1/2 tsp ground cinammon
1/8 tsp nutmeg
1 tsp pure vanilla extract
1/4 cup Grand Marnier
8 slices day old white bread (or just store bought sliced white bread), crusts removed and cut into 1/2 inch cubes (about 4 cups).
Preheat the oven to 350º F. Grease a 6 cup loaf pan with butter.
Heat the half and half in a large saucepan over medium heat. When it comes up to a gentle boil, whisk in 1 cup of the chocolate chips, whisking constantly unil the chips have melted and are incorporated into the cream. Remove from heat.
Whisk the eggs, sugar, cinnamon, nutmeg, vanilla and Grand Marnier together in a large mixing bowl until very smooth. Add the egg mixture to the cream mixture and mix well.
Add the bread, incorporate thoroughly and let the mixture sit out for 30 minutes, stirring occasionally.
Pour half the mixture into the prepared pan. Sprinkle the top with the remaining chocolate chips. Pour the remaining bread mixture over the chocolate chips.
Bake until the pudding is set in the center, about 55 minutes.
Let cool for 5 minutes.
To serve, cut the pudding into 1 inch thick slices. Top with spiced cream.
Spiced Cream
1 quart heavy cream
1/4 cup granulated sugar
1/2 tsp cinnamon
1/4 tsp nutmeg
Beat the cream with an electric mixer on high speed in a large mixing bowl for about 2 minutes. Add the sugar, cinnamon, and nutmeg and beat again until the mixutre thickens and forms stiff peaks, another 1-2 minutes.
Friday, October 14, 2005
Peach Melba
Summer is the time for sun-warmed peaches.

Alas, my parent's peach is ailing, and though it produces hundreds of fruits, they are all tiny little suckers, with barely a half-inch of flesh around the pit. (This is a result of bark beetles; one can prevent an infestation by the simple expedient of a ring of Tanglefoot sticky resin painted around the trunk. This also prevents aphid-farming ants.) So what do you do with hundreds of little tiny peaches?
Use them in recipes, of course.
N.B.: You can easily remove skins from peaches by cutting an X in the bottom and immersing the peaches for 30-60 seconds in boiling water. This step is entirely unnecessary with very fresh peaches as the skin slips off easily.
Peach Melba
You will need:
1/2 cup AND 1/4 cup granulated sugar
1 cup AND 1/4 cup water
2 tblsp fresh lemon juice
4 medium peaches, pitted, peeled, and sliced (about 2 cups of tiny peach slices)
2 cups fresh raspberries (or 2 cups frozen berries, thawed)
1 tsp vanilla extract
Vanilla ice cream (or frozen yogurt)
Fresh mint leaves for garnish (optional)
In a large skillet, combine 1/2 cup sugar, 1 cup water, and lemon juice. Mix well, bring to a boil over medium heat, and cook for five minutes. Place peach slices in skillet and reduce heat to low; cover and cook, turning once, until tender (about six minutes.) Drain the peaches and discard the liquid; place peaches in small bowl, cover with plastic wrap, and chill.
In a blender or food processor combine raspberries and remaining water. Process until smooth and strain to remove seeds (unless you don't care about them.) In a small bowl, mix raspberry purée with remaining sugar and vanilla; cover and chill for ten minutes. Put it all together— peaches go in bowls, top with vanilla ice cream, drizzle the raspberry sauce on top, and garnish with the mint.
Thursday, October 13, 2005
Arroz Con Pollo With Apples
I was up in Seattle for my brother's birthday, and my sister-in-law served us a marvelous meal.
You will need:
2 large Granny Smith apples
8 boneless, skinless chicken thighs
1 tsp kosher salt
1 tsp black pepper
6 tbsp olive oil
1 green pepper, coarsley chopped
1 yellow pepper, coarsley chopped
1 medium onion, diced
3 cloves garlic, minced
1 14.5 oz can diced tomatoes
1 tbsp paprika
1/4 tsp red pepper flakes (or more to taste)*
1 cup fast cook (minute rice) long grain rice (N. uses minute brown rice)
2 cups chicken broth
*Quite obviously, if you want to turn up the heat, use chipotle chiles, jalepeños, or habañeros.
Quarter, core and slice the apples into 1/4 inch thick pieces, set aside. (Do not peel.) Season the chicken with the salt and black pepper. In a large (deep) skillet, heat the olive oil; add the chicken and cook four minutes per side or until it is golden brown. Remove the chicken from the pan but save the oil. Cook the bell peppers (and hot peppers, if using), onion, and garlic in the oil until tender, about ten minutes. Add the tomatoes and apples to the pan; cook eight to ten minutes longer. Add the paprika and red pepper; stir well and add the rice. Stir over the heat for two minutes; add the chicken broth and bring to a boil.
It seems to me that if your skillet is not big enough to hold all of this, you could heat a large pot and dump the whole shebang into that when it starts getting too full.
Reduce the heat to medium-low, arrange chicken over everything, and cover. Cook for twenty minutes or until liquid is absorbed; serve with sour cream.
Wednesday, October 12, 2005
Cabbage and Coleslaw
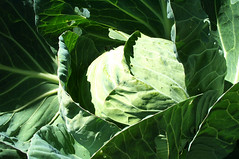
This is the lovely cabbage plant. See the delicate folds of green.
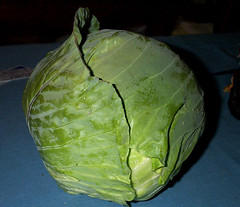
This is the cabbage you get from the plant. But what do you do with cabbage?
Well, there's always corned beef and cabbage, or boiled cabbage at Christmas, but it's summer, so cabbage means coleslaw!
I asked my dad for his recipe, since I'm not a big coleslaw fan myself, but his isn't much of a recipe per se. He takes the prepackaged coleslaw mix or bottle and cuts it with mayonnaise and vinegar, because the mix is too sweet otherwise. Do that to taste.
Simply Recipes has a coleslaw recipe that has both mayo and non-mayo versions. The non-mayo version has a lot of sugar in it, though.
You will need:
Cabbage, either green or purple or both
Carrot
Green onion
For Mayo version:
Mayonnaise
Yellow mustard
Pepper
For Non-mayo version:
Rice vinegar or white vinegar
Sugar
Salt and pepper
Starting with a head or half a head of cabbage, thinly slice the cabbage until you have approximately 4 cups (not packed) of sliced cabbage. Julienne a half of a carrot. Thinly slice a couple of green onions.
For the mayo dressing version, add 3 Tbsp mayo, 1/2 teaspoon of yellow mustard and mix in with the cabbage, carrot, and onions. Add pepper to taste.
For the non-mayo version, add a couple tablespoons of rice vinegar. Sprinkle with sugar, salt, and pepper to taste.
Diana's kitchen has North Carolina Coleslaw.
You will need:
1 pound finely shredded cabbage
1 medium onion, finely chopped
1 medium green pepper, finely chopped
1/2 cup vinegar
1/2 cup sugar
1/2 cup salad oil
salt
pepper
celery seed
Put cabbage, onion, and green pepepr in a large bowl.
In a saucepan, combine vinegar, sugar, and salad oil; heat to boiling. Immediately pour over vegetables in the bowl. Add salt and pepper and a generous sprinkling of celery seed, to taste. Toss to coat vegetables. Refrigerate coleslaw for several hours or overnight for best flavor.
And Cook's Recipes has Tangy Coleslaw
You will need:
1/2 large head cabbage, shredded
2 large carrots, shredded
1/2 cup finely chopped green pepper
2 tablespoons finely chopped onion
Dressing:
1/4 cup sugar
3 tablespoons vinegar
2 tablespoons vegetable oil
1 teaspoon celery seed
1/2 teaspoon salt
Freshly ground pepper to taste
In a large bowl, combine cabbage, carrots, green pepper and onion.
In a jar with with a tight-fitting lid, combine dressing ingredients; shake well. Pour over cabbage mixture and toss well. Cover and refrigerate for 4 hours before serving.
That seems to have a lot of sugar in it, though.
Starting from that, one can get the basic idea of a coleslaw. You start with your cabbage, and you add shredded carrot, onion, and perhaps bell pepper. That's your base. For your dressing, you can either go the mayo route or the vinegar and oil route, though I've heard that a mayo and vinegar combo usually works out well. You add some salt and pepper (and sugar if you must), then flavor the way you like to. (I think the mustard would add a nice kick, and would harmonize well when served with hot dogs.)
Of course, you're asking why I'm posting coleslaw recipes when I admit I do not eat it myself. Well, I saw the cabbage my dad pulled out of the garden and I was inspired. And if you invite me over, I'll even try your coleslaw recipe.
Tuesday, October 11, 2005
Strawberry Shortcake and Belgian Waffles
Start off with your adaptable sliced strawberries. You will need:
Strawberries (go figure)
Small, sharp knife
Lemon juice or orange juice
Granulated sugar
Plastic lidded container
Wash your strawberries and hull them (remove the stem area.) Very fresh strawberries will, of course, need little removed.
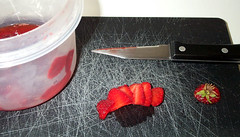
Add your juice.
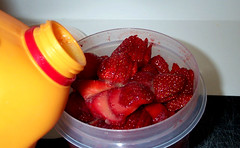
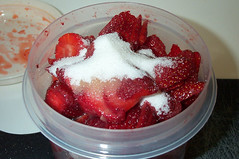
Sprinkle sugar on top; this not only draws the juice to make the strawberries syrupy but enables the mix to last a few days longer in the fridge.
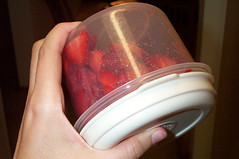
Put the lid on your container and shake and then pop in the fridge.
So first, you've got your strawberry shortcake to make. Sure, you can use premade angel food cake or pound cake (I prefer the latter), but where's the fun in that? For a biscuity shortcake, try the following recipe.
You will need:
1 3/4 cup all-purpose flour
2 tblsp sugar
1 tblsp baking powder
1/2 tsp grated orange peel
3 tblsp unsalted butter cut into pieces
3/4 cup skim milk
Preheat oven to 450º and grease a baking sheet. Sift together the flour, sugar, and baking powder in a large bowl, then mix in the orange peel. Use a pastry blender or two knives to cut the butter into the flour mixture until coarse crumbs form. Stir in the milk until a soft dough forms. Roll out the dough on a lightly floured surface to 1/2 inch thickness. Cut out biscuits with a cutter or the rim of a glass. Re-roll the trimmings to cut out more biscuits. Bake on the prepared sheet for 12 to 15 minutes, until golden. Cool slightly, then split horizontally and fill with strawberry mix and whipped cream.
One note about that whipped cream:
Do not use Cool Whip.
Do not use Cool Whip.
Do not use Cool Whip.
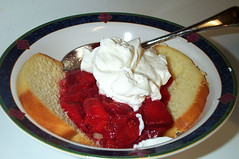 Okay, I used pound cake. But it's still good.
There is no earthly reason why a person who owns a hand mixer or a blender or even a food processor should be buying Cool Whip. Freshly whipped cream is so far superior and not even really expensive when you realize that 1/3 cup of whipping cream gives a generous amount of whipped cream for two people. Besides, then you not only leave out the preservatives, but there's other benefits, as I will point out in a moment when we do the Belgian Waffles with Strawberries.
You will need:
Belgian Waffle Mix (because, honestly, do you really need to make that from scratch?)
Whatever the mix requires
A waffle iron
Whipping cream
Prep your waffle iron according to manufacturer's directions and make up some waffle mix. If you have a toaster or toaster oven, I'd suggest making extras to stick in the fridge. They're better (and cheaper) than Eggos but they won't reheat well in a microwave. Start making them up.
Now, for the whipping cream. If you're using a hand mixer or hand blender, make sure you have a bowl with tall sides. Whip the cream until it is well and truly whipped, then keep going. You'll start getting some yellow undertones. The idea here is to whip this cream halfway to butter or maybe a little further. Every so often, clean your beaters with a spoon and stir the cream, since there will be less whipped areas around the rim.
Yes, you too can make butter. Isn't that cool?
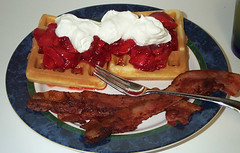
Anyway, serve your fresh hot waffles with a generous serving of strawberry mix and very whipped cream on top. I would suggest a tall glass of juice on the side and maybe some bacon as well.
Strawberries (go figure)
Small, sharp knife
Lemon juice or orange juice
Granulated sugar
Plastic lidded container
Wash your strawberries and hull them (remove the stem area.) Very fresh strawberries will, of course, need little removed.

Add your juice.

Sprinkle sugar on top; this not only draws the juice to make the strawberries syrupy but enables the mix to last a few days longer in the fridge.

Put the lid on your container and shake and then pop in the fridge.

So first, you've got your strawberry shortcake to make. Sure, you can use premade angel food cake or pound cake (I prefer the latter), but where's the fun in that? For a biscuity shortcake, try the following recipe.
You will need:
1 3/4 cup all-purpose flour
2 tblsp sugar
1 tblsp baking powder
1/2 tsp grated orange peel
3 tblsp unsalted butter cut into pieces
3/4 cup skim milk
Preheat oven to 450º and grease a baking sheet. Sift together the flour, sugar, and baking powder in a large bowl, then mix in the orange peel. Use a pastry blender or two knives to cut the butter into the flour mixture until coarse crumbs form. Stir in the milk until a soft dough forms. Roll out the dough on a lightly floured surface to 1/2 inch thickness. Cut out biscuits with a cutter or the rim of a glass. Re-roll the trimmings to cut out more biscuits. Bake on the prepared sheet for 12 to 15 minutes, until golden. Cool slightly, then split horizontally and fill with strawberry mix and whipped cream.
One note about that whipped cream:
Do not use Cool Whip.
Do not use Cool Whip.
Do not use Cool Whip.
 Okay, I used pound cake. But it's still good.
There is no earthly reason why a person who owns a hand mixer or a blender or even a food processor should be buying Cool Whip. Freshly whipped cream is so far superior and not even really expensive when you realize that 1/3 cup of whipping cream gives a generous amount of whipped cream for two people. Besides, then you not only leave out the preservatives, but there's other benefits, as I will point out in a moment when we do the Belgian Waffles with Strawberries.
You will need:
Belgian Waffle Mix (because, honestly, do you really need to make that from scratch?)
Whatever the mix requires
A waffle iron
Whipping cream
Prep your waffle iron according to manufacturer's directions and make up some waffle mix. If you have a toaster or toaster oven, I'd suggest making extras to stick in the fridge. They're better (and cheaper) than Eggos but they won't reheat well in a microwave. Start making them up.
Now, for the whipping cream. If you're using a hand mixer or hand blender, make sure you have a bowl with tall sides. Whip the cream until it is well and truly whipped, then keep going. You'll start getting some yellow undertones. The idea here is to whip this cream halfway to butter or maybe a little further. Every so often, clean your beaters with a spoon and stir the cream, since there will be less whipped areas around the rim.
Yes, you too can make butter. Isn't that cool?
Anyway, serve your fresh hot waffles with a generous serving of strawberry mix and very whipped cream on top. I would suggest a tall glass of juice on the side and maybe some bacon as well.

Monday, October 10, 2005
Chocolate Strawberries (and Lazy Fondue)
One of the pure joys of strawberry season is to have chocolate-dipped strawberries. They're not as hard as you might think, though you do have to prepare them sufficiently in advance so as to let them cool to room temperature.
You will need:
Washed, firm strawberries (as fresh as possible without exploding into juice when you handle them)
Chocolate of your choice (do NOT get melting chocolate, which just tastes waxy)
A double-boiler
Waxed paper
You put some water in the bottom pan of the double boiler, heat it to boiling, and turn off the burner. Put your chocolate in the top pan and let it just melt (stirring helps.) Add some cool chocolate to help bring down the temperature and stir it in. Exposing the chocolate to air is called "conching" and helps to give it a good taste and texture— but since you're using prepared chocolate, and proper conching takes days, don't worry about it. :) Then you dip the strawberries (using a spoon helps to coat them):
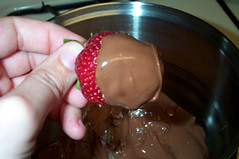
Place the dipped strawberries on waxed paper and let cool completely. If you put them in the fridge, you increase the chance of "bloom", which is the mottled surface that sometimes appears on melted and re-hardened chocolate. While unattractive, bloom is not in the least dangerous and can be gotten rid of by re-melting and mixing the chocolate. In fact, I used chocolate bars with bloom for coating these strawberries, and as you can see, they look great.
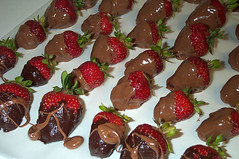
(Incidentally, that lighter chocolate of the somewhat unfortunate color is Symphony bars, extremely milk chocolate. It's what I had on hand. Dark chocolate is best for strawberries as the bitterness is a perfect foil for the sweet berries.)
If you are having trouble making the chocolate melt smoothly, I have been told that margarine (not butter!) can help the chocolate melt properly. I have never had trouble making the chocolate melt.
I have also been told that you can melt chocolate in the microwave. (Which makes sense, because melted chocolate bars were how they discovered the cooking applications of microwaves.) Be extremely careful if you try this, as chocolate gets very hot very fast, and do no longer than 30 second bursts, if that.
Now on to the lazy person's chocolate fondue. It's simple; you go on a picnic, you take your chocolate bars, unwrap them, place them in a sturdy container (not, I repeat, NOT one-use plastic containers)... and then you leave them in the car with the windows rolled up.
On an overcast summer's day where the temperature is in the 70s, a closed car in the sun can get over 160º in half an hour. And, of course, everyone knows how melted candy bars get in your pocket on a warm day, so why not take advantage of this fact? When it comes time for dessert, simply get the pot-o-melted-choc out of the car and dip your fruit and your cake in the melted chocolate. You could even do a reverse S'more and dip marshmallows in melted chocolate and sandwich them between graham crackers.
Dang. Now I want S'mores.
You will need:
Washed, firm strawberries (as fresh as possible without exploding into juice when you handle them)
Chocolate of your choice (do NOT get melting chocolate, which just tastes waxy)
A double-boiler
Waxed paper
You put some water in the bottom pan of the double boiler, heat it to boiling, and turn off the burner. Put your chocolate in the top pan and let it just melt (stirring helps.) Add some cool chocolate to help bring down the temperature and stir it in. Exposing the chocolate to air is called "conching" and helps to give it a good taste and texture— but since you're using prepared chocolate, and proper conching takes days, don't worry about it. :) Then you dip the strawberries (using a spoon helps to coat them):

Place the dipped strawberries on waxed paper and let cool completely. If you put them in the fridge, you increase the chance of "bloom", which is the mottled surface that sometimes appears on melted and re-hardened chocolate. While unattractive, bloom is not in the least dangerous and can be gotten rid of by re-melting and mixing the chocolate. In fact, I used chocolate bars with bloom for coating these strawberries, and as you can see, they look great.

(Incidentally, that lighter chocolate of the somewhat unfortunate color is Symphony bars, extremely milk chocolate. It's what I had on hand. Dark chocolate is best for strawberries as the bitterness is a perfect foil for the sweet berries.)
If you are having trouble making the chocolate melt smoothly, I have been told that margarine (not butter!) can help the chocolate melt properly. I have never had trouble making the chocolate melt.
I have also been told that you can melt chocolate in the microwave. (Which makes sense, because melted chocolate bars were how they discovered the cooking applications of microwaves.) Be extremely careful if you try this, as chocolate gets very hot very fast, and do no longer than 30 second bursts, if that.
Now on to the lazy person's chocolate fondue. It's simple; you go on a picnic, you take your chocolate bars, unwrap them, place them in a sturdy container (not, I repeat, NOT one-use plastic containers)... and then you leave them in the car with the windows rolled up.
On an overcast summer's day where the temperature is in the 70s, a closed car in the sun can get over 160º in half an hour. And, of course, everyone knows how melted candy bars get in your pocket on a warm day, so why not take advantage of this fact? When it comes time for dessert, simply get the pot-o-melted-choc out of the car and dip your fruit and your cake in the melted chocolate. You could even do a reverse S'more and dip marshmallows in melted chocolate and sandwich them between graham crackers.
Dang. Now I want S'mores.
Sunday, October 09, 2005
Strawberry Tart, Tarts, and Pie
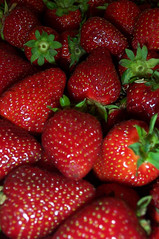 The California strawberry season has begun, and sometimes will last as long as July or August. Those of you who have yet to get strawberries take hope; your time will come.
The best strawberries are always the local ones. Strawberries are very delicate and even the trip to the store is enough to necessitate the picking and packing of not-quite-ripe berries. Your best bet is to find a little family strawberry stand at the side of a semi-rural road, especially one that is attached to a piece of land where they grow the berries.
Of course, there is a downside to these very fresh berries: You have to process them immediately. And by "immediately" I don't mean the next day; you can end up with moldy strawberries in a depressingly short time. However, it's not so bad, because there are things you can do to keep your strawberry wonders intact. One is to use this marvelously versatile filling recipe in any manner you please.
You will need:
1/2 cup granulated sugar
3 tbsp cornstarch
2 cups fresh strawberries (1 pint)
1/2 cup water (with caution; see instructions below)
2 tbsp fresh lemon juice
The first thing you do is to "hull" the strawberries, which means to remove the stem area. Storebought strawberries will often need the entire white top cut off but utterly fresh strawberries just need a tiny bit. I have a tendency to do a generous two cups because, well, strawberries are tasty.
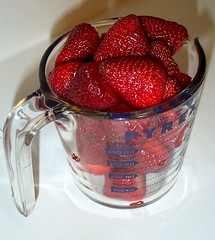
In a handled saucepan, combine the sugar and cornstarch, and mix well. Add the two cups of berries and mash them.
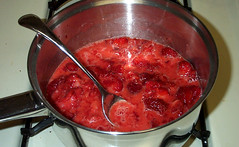
Hmm. That seems really liquid (very fresh strawberries), so instead of the 1/2 cup water I will take the 1/2 cup measure, put the lemon juice in it, throw in some orange juice for fun, and barely top it off with water (scant 1/2 cup instead of full 1/2 cup.) Then you bring it to a simmer and stir until thickened, a half hour or more, while stirring so the strawberries don't stick to the pan and burn. Heck, get a book and read with one hand while stirring with the other.
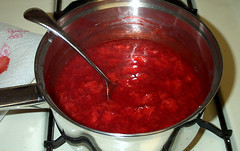
Once the strawberries are stewed, stick in a lidded container and cool completely. This can last for week or two in the fridge due to its strong sugar concentration (the same thing that keeps honey from spoiling.)
If you'd like to make this into a tart, you will need:
1 cup all-purpose flour
2 tbsp granulated sugar
1/2 tsp salt
1/4 cup vegetable oil
3 tbsp plain yogurt
About 18 pretty strawberries, halved
In a large bowl, combine flour, sugar, and salt. Make a well in the center and stir in the yogurt and oil until the dough forms a ball. Flatten slightly; wrap in plastic wrap and chill for 20 minutes. Preheat oven to 400º F and grease a 9-inch tart pan. Roll the dough between two sheets of waxed paper into an 11-inch circle; press into tart pan. Pierce it with a fork and bake until golden, about 12 minutes. Cool on a wire rack.
Spread the berry mixture into the crust and arrange halved berries on top. Dust with powdered sugar and serve.
Or you can do the same thing with a frozen pie crust; prepare the crust according to the single-crust pie directions.
Perhaps you'd like to have little tartlets instead. Buy some puff pastry; carefully thaw one sheet and cut into squares. Spoon a big dollop of strawberry filling into the center; fold the pastry over and seal.
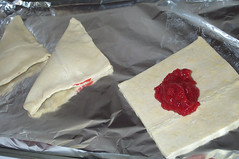
If you like, you can brush the tops with egg white and sprinkle with that big granulated sugar whose name I don't know. Bake according to package directions for 12-15 minutes.
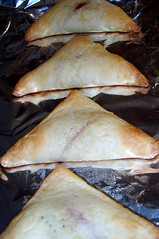
Serve immediately or wrap up in aluminum foil for a packed lunch.
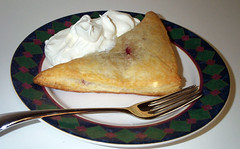
What else can you do with the filling? Try spooning it over French Vanilla ice cream. Mmm.
Saturday, October 08, 2005
Overnight Baker
Overnight Cookies
You will need:
1 egg white
1/2 cup superfine sugar (or crush granulated sugar between two sheets of waxed paper with a rolling pin)
1/2 cup ground almonds
generous 1/2 cup chocolate chips
1/2 cup candied cherries, chopped (or substitute cherry-flavored dried cranberries)
2/3 cup sweetened shredded coconut
Preheat oven to 425º. Line a baking sheet with baking parchment. Whisk the egg white in a large bowl until stiff peaks form. Add sugar a spoonful at a time, whisking until mixed. Fold in the almonds, chocolate chips, cherry bits, and coconut. Place by spoonsful on the baking sheet. Place in the oven, close the door, and turn the oven off. Leave overnight (6+ hours); serve for breakfast.
Lemon Meringue
You will need:
5 egg whites (save the yolks!)
1/4 tsp salt
1/2 tsp cream of tartar
1 1/2 cups sugar
Pie plate (no crust)
Preheat oven to 400º. Beat the eggs until they're foamy, add the salt and cream of tartar, and beat until peaks start to form. Mix in the sugar gradually and beat until stiff. Spread the meringue in the pie plate and hollow out the middle (like IT'S a crust.) Place in the oven, turn it off, and leave overnight (5+ hours.) Fill it in the morning with lemon filling:
You will need:
5 egg yolks
1/2 cup sugar
4 tblsp lemon juice
Grated lemon rind
1 cup whipping cream
Beat the yolks, and slowly add the sugar. Blend in the lemon juice and rind, and stir over boiling water (in a double boiler, natch) for six or seven minutes. Beat the whipping cream and put half of it in the meringue shell; pour the lemon mixture over the cream and top with the rest. Refrigerate until set.
You will need:
1 egg white
1/2 cup superfine sugar (or crush granulated sugar between two sheets of waxed paper with a rolling pin)
1/2 cup ground almonds
generous 1/2 cup chocolate chips
1/2 cup candied cherries, chopped (or substitute cherry-flavored dried cranberries)
2/3 cup sweetened shredded coconut
Preheat oven to 425º. Line a baking sheet with baking parchment. Whisk the egg white in a large bowl until stiff peaks form. Add sugar a spoonful at a time, whisking until mixed. Fold in the almonds, chocolate chips, cherry bits, and coconut. Place by spoonsful on the baking sheet. Place in the oven, close the door, and turn the oven off. Leave overnight (6+ hours); serve for breakfast.
Lemon Meringue
You will need:
5 egg whites (save the yolks!)
1/4 tsp salt
1/2 tsp cream of tartar
1 1/2 cups sugar
Pie plate (no crust)
Preheat oven to 400º. Beat the eggs until they're foamy, add the salt and cream of tartar, and beat until peaks start to form. Mix in the sugar gradually and beat until stiff. Spread the meringue in the pie plate and hollow out the middle (like IT'S a crust.) Place in the oven, turn it off, and leave overnight (5+ hours.) Fill it in the morning with lemon filling:
You will need:
5 egg yolks
1/2 cup sugar
4 tblsp lemon juice
Grated lemon rind
1 cup whipping cream
Beat the yolks, and slowly add the sugar. Blend in the lemon juice and rind, and stir over boiling water (in a double boiler, natch) for six or seven minutes. Beat the whipping cream and put half of it in the meringue shell; pour the lemon mixture over the cream and top with the rest. Refrigerate until set.
Friday, October 07, 2005
Booklore's Recipe Challenge!
I declare a recipe challenge! The rules are simple. You post a recipe, and challenge somebody to do one of three things:
1. Use up extra ingredients or byproducts of the recipe (such as egg yolks);
2. Make a complementary dish to go with the recipe (such as a side dish to go with an entree); or
3. Make a new recipe with several of the ingredients so as to use up extras you might have (such as the rest of a bag of spinach leaves.)
You accept the challenge in the comments, post your answer on your own blog as well as a second recipe to declare your own challenge. (Be sure to submit your recipes to the Carnival of the Recipes, recipe dot carnival at gmail dot com, before the next Friday. If you don't have your own blog, the Carnival of the Recipes will post your entry for you.)
You should probably post the above as well, so everybody knows what the heck is going on.
So to begin, I found a recipe for a coconut-hazel smoothie.
You will need:
scant 1 cup blanched hazelnuts
2 tsbp superfine sugar (or crush granulated in a mortar)
1/2 tsp almond extract
scant 1 cup coconut cream
2 tbsp heavy cream (optional)
2/3 cup mineral water
crushed ice
Chop the hazelnuts and lightly toast them in a non-stick pan, stirring frequently. Let the nuts cool, then run them through the blender with the sugar until finely ground. Add the almond extract, coconut cream and heavy cream; blend until smooth. Strain the mixture through a sieve* into a pitcher, pressing firmly, and mix the juice with mineral water. Pour the drink over crushed ice and serve.
The * is because at this point, you are left with a hazelnut mash with hints of almond and coconut. Perhaps you could use that as the crumb base for a key lime pie. Or you may decide that the perfect foil to the smoothie is macadamia nut cookies, or instead decide to use the ingredients to come up with a coconut-hazelnut chicken recipe.
Do you want to take the challenge? Please accept in the comments!
Update: The challenge has been accepted! Head over to Everything and Nothing to learn about Coconut Cream Pie!
Thursday, October 06, 2005
Tuna Salad Sandwich
Tuna fish, tuna fish, tuna tuna tuna fish.The incomprehensible weirdness of that song is only truly experienced when you hear it sung at you from out of the blue as a form of applause.
Is it in your hair? Yes it's in your hair!
Tuna fish, tuna fish, tuna tuna tuna fish.
*ahem*
Anyway, my husband is very fond of tuna salad sandwiches, so I thought I'd share his favorite recipe for them.
You will need:
1 can tuna in water
Mayonnaise
Cream-style horseradish
Sweet pickle relish
Bread, preferably sourdough
Toast the bread. Mix the tuna with approximately a 2:1 ratio of mayonnaise to horseradish until it is at spreadable consistency; add about 1 spoonful relish and stir. Spread on the bread and make a sandwich. Eat it. There is no more.
Wednesday, October 05, 2005
Burrito Basics (and Basic Burritos)
Burritos are an amazingly quick dish, so widespread as to be generally considered American (or at least Mexicali.) This may not have been true a few decades ago— I was just reading a 1960s cookbook that referred to enchiladas as foreign food— but for our Taco Bell tastes, a burrito may be comfort food.
A traditional burrito includes a tortilla, beans, and rice. Many vegetarians have learned that beans and rice, eaten together, give as complete a protein as most meats. This is important in a vegetarian diet. Naturally, those who originally came up with the beans/rice combo were not looking to make complete protein but to fill up, which that certainly will. A traditional burrito would also use a corn tortilla, something we Americans generally eschew in favor of flour tortillas.
Burritos were a lower-class food. (Keep in mind that under the domnion of Spain, those of purest Spanish descent were the upper class, and it went down from there until you hit rock bottom with the native population. Traces of this remain today.) They were cheap and easy and filling, as well as being portable, and they did not require meat, which was often unavailable to the workers.
However, I like beef, and I don't care for rice in my burritos, so my recipe is somewhat different.
Ten-Minute Burritos
You will need:
1 can refried pinto or black beans*
1/3 pound lowfat ground beef
Hot sauce
Salt, pepper
Chili powder
Cumin
1/4 of an onion
Cheese, cheddar or pepper jack
4 flour tortillas
*Buy the vegetarian style; it's not fried in lard.
1. Dice the onion and throw it into a pan. Throw the beef on top and use the edge of a spatula to separate it into tiny bits. Dust lightly with chili powder and cumin (and a little salt and pepper); if you like heat, add a splash of Tabasco. If you really like heat, dice up a jalepeño, seeds and all, and add it in. Turn the stove on to medium-low heat.
2. Open the can of beans and put into a microwave-safe bowl. Make sure to stir it well. Cover it with waxed paper or a plate and microwave for two minutes. I don't care what the can says; if you microwave it for that long you'll atomize your beans.
3. Stir the meat.
4. Grate the cheese. If you bought the pre-grated, I'm sorry. (I am a bit of a cheese snob.)
5. Check the meat again. If you bought the lowfat kind (4% fat, usually), all of the liquid should cook off. If it's not doing that fast enough, turn up the heat.
6. Remove the beans from the microwave and stir thoroughly again. Put the tortillas in the microwave and heat them for at least thirty seconds; if they are not heated, they will tend to split rather than bend.
7. When the meat is done, serve immediately by placing ingredients in the center of the tortilla in the order that you choose and wrapping. Unless you're a professional, don't worry about getting the wrapping correct. (I leave the top end open just to simplify things.) This should feed two people with healthy appetites; add tortillas for more, smaller burritos.
This takes less than ten minutes with practice, but whatever it takes, it's fast when you're hungry.
Variations:
Add salsa or sour cream.
Make your own salsa by dicing a juicy fruit or tomato with red or yellow bell peppers, green or sweet onions, and red pepper flakes.
Add shredded greenery or spinach.
Add black olives.
Add wild rice and omit the meat.
If you can wrap a burrito well, make chimichangas by frying the completed burrito in a skillet with vegetable oil.
Use flavored tortillas such as sun-dried tomato.
Go to a burrito-making food place (Chipotle barely counts; try Sonic Burrito in Spokane for a more variety-filled experience) and see what they add.
Tuesday, October 04, 2005
Tasty Rice
You'll note that this has many of the same ingredients as the Spinach Salad; it is intended to use up the leftovers.
You will need:
White rice, not instant (plus instructions for making it)
Water
Butter or margarine
Carrot
Yellow onion
Mushrooms
Spinach leaves
Boullion cubes (we used chicken)
Chop the carrot, mushrooms, and portion of a yellow onion into small pieces. Sauté them with the spinach in the butter. Throw them into a microwave-safe container with the measured rice and water (our rice says 1 cup rice to 2 cups water, but use your own directions!) and add in a boullion cube— or two if you're really feeling the need for savor. (Please note that boullion is salty, so be careful.)
Microwave the covered dish for five minutes, or longer if you have an old microwave and the water hasn't boiled. Let it sit for at least ten minutes. Stir it up once, replace the lid, and repeat the sequence. This time, let it sit until the rice has absorbed all of the water. Stir to fluff up the rice and serve immediately.
For a lower-salt alternative, replace the water with low-salt canned broth and omit the boullion, and you can make this recipe completely vegan by doing the same thing with vegetable broth and using margarine instead of butter.
Monday, October 03, 2005
Spinach Salad
Easy side dish.
You will need:
Spinach leaves (bagged is fine)
Green onion
Orange
Carrot
Mushrooms
Walnuts
Put all ingredients in a bowl (peel and section that orange first!) and top with dressing; I suggest raspberry-walnut vinaigrette or Walla Walla sweet onion dressing (available at Costco.)
You will need:
Spinach leaves (bagged is fine)
Green onion
Orange
Carrot
Mushrooms
Walnuts
Put all ingredients in a bowl (peel and section that orange first!) and top with dressing; I suggest raspberry-walnut vinaigrette or Walla Walla sweet onion dressing (available at Costco.)
Sunday, October 02, 2005
Macaroni and Cheese
Guestblogged by Joan
(since my mother-in-law is here, I thought I'd have her write the recipe!)
You will need:
12 oz macaroni (any type)
1 cup cottage cheese
1/2 cup sour cream
Lots of grated cheese (sharp cheddar, or cheese of your choice)
1 egg
1 tsp salt
1 tsp pepper
Topping:
2 cups bread crumbs
1 stick butter or margarine, melted
1 cup shredded cheese
Boil pasta according to package directions but do not cook all the way through (al dente.) Mix other ingredients; stir into drained pasta. Place in greased casserole dish. Mix topping ingredients; spread on top. Bake at 350º for thirty minutes or until brown and crisp.
Update:My mother notes that the amount of breadcrumbs seems excessive. Feel free to cut down the topping ingredients by half.
side note (Bernadette): When I was growing up, I thought that macaroni and cheese was just that— macaroni with grated cheese on top. Boy, was I wrong!
Saturday, October 01, 2005
Orange Glaze For Ham
You will need:
1 tblsp cornstarch per 1 cup orange juice
raisins or dried cranberries (optional)
This is so very simple. You sprinkle the cornstarch into the orange juice (if you drop it in all at once, it clumps), add the raisins if you're gonna, and heat over medium-low heat until it thickens, stirring all the while. Serve with your Easter ham or eat as a side... um, well, it's not really supposed to be a side, is it? Never mind...
Subscribe to:
Comments (Atom)