Monday, December 12, 2005

Traditional Polish-American Christmas Eve Meal

When I was growing up, we always had the "traditional" Polish Christmas Eve meal. As this meal involved can openers, you can see that it's not that traditional. However, thanks to the Power of the Internet, it's pretty easy to go back to the roots and find out where the traditions actually came from and what, precisely, they are supposed to be.

To begin with, the Christmas Eve meal is vegetarian. However, this came from a time when "vegetarian" meant "not animal", so part of the meal is fish. I waffled between liking this and not liking this part. Other parts of the meal usually flipped around in favor as well, depending on my tastes at the time.

The meal begins at the time the first star is sighted. This may be difficult if the sky is overcast or you live in a city. Substitution of a blinking plane is acceptible. The meal itself is the Wigila, the Vigil. One should put a white tablecloth on the table and leave an extra place setting for absent family members. Please note that small children in the family will probably object to this custom, as it interferes with their sense of what is right. Ignore them.

The meal opens with soup, a potato-mushroom one. Growing up, this was Campbell's— one can each of cream of potato and cream of mushroom. But since I've grown up and learned to cook, it's much more fun to make from scratch. This dish can be made early and heated up at the last minute.
Thick and Chunky Potato-Leek-Mushroom Soup

You will need:
-Leeks. My original recipe calls for three medium leeks but they grow them really big around here, so I use one large. This is oniony, so increase or decrease it based on your preferences.
-Potatoes. Again, this calls for four "medium" potatoes and I have yet to run across a truly medium potato.
-Butter. Ain't nothing like the real thing, and you'll need a lot for another dish.
-Mushrooms. The standard store mushroom is fine, but Crimini (Italian Brown) mushrooms are similar in taste to Portabella mushrooms, but cheaper.
-Chicken broth. Buy the low-sodium kind or make your own. Yes, you can use vegetable broth as well.
-Milk.
-Salt and white pepper, unless you don't care about little black flecks in your food, in which case black pepper works fine.

Cut off the green stems of the leeks and wash to remove sand. Cut them longwise and then crosswise into little chunks. Melt the butter over low heat in your soup pot and saute the leeks until soft, about five minutes.

Peel and cut the potatoes into inch-wide chunks. Throw them into the pot. Cut up the mushrooms. Throw them into the pot. Use enough broth to cover the potatoes and mushrooms and set the heat to simmer. Partially cover the pot and simmer until the poatoes are cooked, about 45 minutes. At this point you can set it aside to wait for later.

It's later, so get out your blender. I generally pull out half of the chunks or potato and put them in the serving bowls, then take the remainder and put it in the blender with milk and spices to taste. (Remember, liquids first! Don't burn out your blender; fried electronics have an unappetizing smell.) Blend until smooth— you may have to do this in sections— and reheat if necessary, then pour over the chunks of potato. Serve immediately.
The next course of the meal is the main course. This includes a fried white fish, boiled cabbage or sauerkraut (oddly enough, I never quite liked this part), and pierogi (little Polish dumplings) filled with things such as prunes and cottage cheese with cinnamon.

No, really. It's actually supposed to be a soft cheese with cinnamon. Cottage cheese not only fits the bill, it's quite common in this regard.

Last year, for the pierogi, my sister served Trader Joe's Potato Cheese Pierogi. My father— the one who was raised with this traditional meal— tasted them, and said they tasted nothing like what he grew up with. After a pause, he added, "This is much better." This company sells pierogi, if you don't have a Trader Joe's in your area— that would be anyone who doesn't live in the Western states.

If you want to cook your own, Cooks.com has a bunch of recipes. Just remember that fillings such as prunes, raisins, and cottage cheese are among the traditional ones. No wonder my interest waffled.

As for the fish, pick one that is native to your area for the best effect, though I'd avoid catfish. It is to be fried in butter with slices of hard-boiled egg. You may see some recipes refer to "brown butter"— this is a high-fat European variety that is often available in the supermarket under varying names. This Thanksgiving I was treated to pumpkin ravioli fried in brown butter and sage, and I can attest that it is Oh. So. Good. Be careful not to burn the butter, though.

And then we come to the cabbage. I never liked this part, but I've found some recipes that may improve on the simple "boil and add salt and pepper" method.
Cabbage With Caraway

You will need:
-Water
-Onion, fresh or dried
-Caraway seeds
-Salt
-Small head of cabbage
-A big pot

Boil about a quart of water with a little minced onion, salt, and caraway seeds. After about ten minutes, cut the cabbage into small wedges and boil until tender, but not so long that the whole thing is mush. Serve immediately.
Caraway is apparently one of the traditional Polish spices.
Boiled Red Cabbage

You will need:
-1 small red cabbage, quartered and thinly sliced
-1 tart apple, grated
-butter (again!)
-1/4 cup vinegar (I suggest apple cider vinegar, for consistency)
-1/2 cup red currant jelly
-1/4 cup water
-salt

I don't know the specific name for this kind of pan, but one of those saucepans that looks like a cross between a handled pot and a frying pan, with a lid, is a pretty good bet for this recipe. Melt the butter over gentle heat, then add everything else, cover, and simmer for about one hour, stirring occasionally. The vinegar will help the cabbage retain its color.
Now we move on to the fruitbread. This is some sweet bread with dried fruits in it.

And let the fruitcake jokes begin. I never understood these jokes as a child— I loved fruitcake. When I got older, I discovered that not all fruitcakes are created equal. Those nasty, brutish things you get from some supermarkets, or that horrible concoction with the unverifiable fruitlike things that your Aunt Martha made are the source of all the jokes. Instead, we got our fruitcakes sent to us from some company in Texas that made a moist, molasses-wonderful confection.

I'd link, but I have no idea who they are. Instead, I'll link the Harry & David site, as their fruitcake is similarly tasty. (You know Harry & David. They're the Fruit of the Month Club™ guys.) Or if you make your own, carefully marinating it over several months with high-quality rum, please don't burn it as my friend Stephanie's aunt invariably did. As she said, "We assumed it was good, but it never got as far as the table."

Okay. The final part to the meal is the sharing of the oplatek, a thin unleavened wafer (available through the internet.) The oldest person breaks it with the next oldest, then that person with the next, and so on down the line until everybody has broken oplatek with everyone else and there are little unleavened flakes all over the floor. Then you eat it and it gums up your teeth.

Ah, memories. Shortly afterwards we were sent to bed so we could get up in time for Midnight Mass, and my parents would assemble any presents that needed assembly. One year, I could make absolutely no sense out of the sounds coming from the front room— a sort of whirring, grinding sound.

That was the year I got an electric train, HO scale. Very cool, and it's still somewhere at my parents' place...
Sunday, December 11, 2005

Cloth Ball Ornaments

Cloth Ball Ornaments

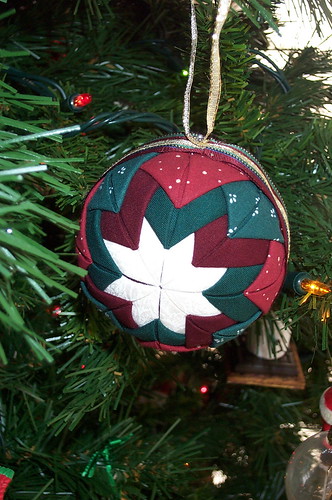
Cloth Ball

These are very time consuming but utterly gorgeous. They're also apt to set off metal detectors, so if you're making them for gifts and flying, please put them in the checked luggage.

You will need:
Holiday cloth, preferably quilting cotton or iron-safe velvet
Styrofoam balls, about three inches across
A rotary blade, a cutting mat, and a cutting ruler (or you'll be at this forever)
Innumerable sequin pins (or at least ninety per ball)
Wide and narrow ribbon
A corsage pin or other long, attractive pin (but not longer than the ball is wide!) plus two long pins with attractive ends
Sequins, if desired
Crazy glue

You begin by cutting strips of cloth 2 1/2 inches wide and ironing them in half with the good side out. Then you cut the strip into 2 1/2 inch sections (so that if you unfolded them, they would be square.) Then you fold the already folded edge down on either side of the center so that they are triangles and iron again. You will need at least forty such triangles for one ball, preferably in pairs or fours or eights so that each side matches.

To begin, you take a square or scrap that hasn't been ironed and pin it down on one side of the ball. Then you take some of your ironed triangles and unfold them enough to stick a pin through the point. Pin four of those onto the cloth square so that the folded edges are up, as in the center of the picture above. Pin down their corners so that they lay more or less flat against the ball.

Take eight more triangles, possibly of alternating colors, and put pins in their points as well. Pin them halfway up the place where the folds meet on the center triangles and at the same distance from the center in between the triangles. Always overlap them the same direction— make sure that the right side of the triangle goes over the left side, or vice versa. Pin down their points. I find that it saves time and pins to overlap them first, then pin down through the top layer near the points.

Once again, take eight triangles and put pins in their points, and pin them halway down the place where the folds meet on the previous layer. Overlap as before and pin the edges down. The only pins that should be visible at this point are the ones on the outer edge.

Do the other side the same way, making sure that it is directly opposite the first side. I have had to pull out and start over when it became evident that I was way off the mark to begin with, so save yourself time and get it right at the start.

When both sides are done to your satisfaction, pin a length of the wide ribbon around the edges, folding the cut edge under before pinning. This makes it look finished. Then take a contrasting narrow ribbon and wrap it around the ornament as well, pinning it so that a three-inch loop hangs from the "top" of your ornament. Secure it in place with a final corsage pin, and when that is placed to your satisfaction, pull it out a bit, put a bit of glue on the pin, and push it back into place. That will hold it securely.

You may also put a pin with an iridescent or sequinned top in the center of each "star." When I made the ornament pictured above, I didn't have any pretty pins, so I did without.

Saturday, December 10, 2005

Blown Egg Ornaments

Blown Eggs
Blown egg ornaments are inexpensive to make, and a lot of fun for the craft-minded. However, they do take some time so plan ahead.

You will need:
Eggs - keep the carton
Tiny drill bits
Something long, thin, and sharp - my father uses a medical instrument used to prick the skin for a blood droplet test. It looks like a claw.
A large bowl
Good lungs or a bulb for blowing eggs; you can also use a syringe

Let the eggs sit out at room temperature for an hour. This means, of course, that you'll have to use them within a day or two. Try to blow eggs just before a cookie-making session or have quiche for dinner. Decide which end you want to be the top; that end will get the larger hole. Take a tiny drill bit and a slightly larger one; use your fingers to make the holes in either end. (It is a bad idea to use a pin or a needle to make the holes because this will lead to cracked eggs.) Use the sharp thing to poke around in the egg; you want to not only break the yolk but make sure all interior membranes are broken.

Blow slowly and carefully into the smaller of the two holes; the egg should come out of the larger. If you blow too strongly you can crack the egg. Artificial aids are good to use if you have them. Set the blown eggs aside on a paper towel. When they are all done put the egg stuff in the refrigerator before proceeding. Get a bowl of soapy water; immerse the eggs. (You can also use a syringe to fill the eggs with soapy water.) Put your fingers over the holes and shake each egg so that the interior is throughly washed; drain and set aside.

This is the time consuming part. Put the eggs someplace until they are completely dry; this can take several days.

Now you will need:
Nylon string to hang the eggs; ribbon deteriorates over time
Hot glue or Krazy glue
Spray lacquer or clear nail polish
Spray paint and craft paint
Any decorations you wish to attach such as sequins, plastic gems, or ribbon

Once the eggs are dry, cut five-inch lengths of the string. Tie a knot in them to make a loop. Feed the knot end into the bigger hole of the egg and glue to secure. Make sure the hole is completely plugged; take a little glue and seal the other hole as well. Once the glue is dry, hang the eggs with cardboard or newspaper behind them; give them a light coating of spray lacquer. Turn them around and repeat. Let it dry and then give them a second coat. (This strengthens them.)

Use the spray paint to give them a base coat; careful spattering can acheive an artistic effect. Paint names, symbols, or pictures on them with the craft paint; glue confetti, glitter, or ribbons on as desired. Decoupage is also a good technique if you know it. Tie a bow around the base of the loop with a pretty ribbon.

Store the egg ornaments in the carton. Over the years you can build up quite a collection; my parents have several dozen, some going back for three or more decades.

Friday, December 09, 2005

Walnut Mice

Walnut Mice

The hardest part of this ornament is cracking the walnuts correctly.

You will need:
Whole walnuts (and a nutcracker)
Felt
Ribbon
Googly eyes
Pipe cleaners
Hot glue or Krazy Glue
Permanent marker

Carefully crack the walnuts along the line; the goal is to get a perfect walnut shell half. Empty out the walnut meat and eat as desired. The pointier end of the walnut shell is the nose of the mouse. Use the marker to put a nose on the little beastie. Draw some whiskers or make them out of pipe cleaners, if you desire. Cut out little half-circle felt ears; glue them on. Give the mouse some googly eyes. Glue a tiny bow on the mouse's "neck." Glue a pipe cleaner tail to the underside of the other end. Take a six-inch piece of pipe cleaner and glue it to the underside of one side; you use this to attach the mouse to a branch.

(Alternately, dry out a mini bagel that has had part of its top "eaten" by putting it in the oven on low heat for several hours; spray lacquer it and glue the walnut mouse right next to the eaten section. Attach a loop to the bagel and glue a ribbon to it.)

Thursday, December 08, 2005

Paper Crane Ornaments

Paper Cranes
Paper cranes are a traditional Japanese symbol of peace. There is a legend that the person who folds a thousand cranes will get his wish. They're also very attractive on the Christmas tree.

You will need:
Heavy grade origami paper (try an Asian market for the best styles)
Strong thread
A long, sharp needle
Beads
Little metal rings, 1/4 inch to 1/2 inch
Ribbon, if you like

Fold paper cranes out of the paper. Here's a good How To. Thread the needle with lots of thread (but not so much that you get tangled in it.) Push the needle through the hole in the bottom until it comes out through the top of the crane. Pick a spot 1/4 inch from where the needle came out and push it through there and back out through the original hole. (Lightweight paper tears too easily for this to work.)

Choose which beads you want and put them on the thread. Thread one of the metal rings and then go back down through the beads to the crane. Stitch through the paper again, go back up through the beads, through the metal ring, and back down through the beads. Make sure the string of beads is tight. (But not excessively tight because it will tear the paper.) Push the needle through the top of the crane back down through the hole in the bottom.

Choose some more beads; string them and pick a bead to be the base. (There are many pendant beads for this purpose, but one that coordinates with the thread will also work. Go through that base bead just like you went through the metal ring on the top; go back up through the beads. Stitch through the paper and repeat going through the beads. When you are done, whip stitch around the base of the crane a few times, then slip the needle under the loops, knot the thread, and cut it off. Tie a ribbon bow to disguise the knot; hang from the metal loop.

Wednesday, December 07, 2005

Seashell Ornaments

Seashells
You will need:
Hot glue gun
Shells
Nylon string
Ribbon

This ornament idea came about primarily as a way to deal with an excessively large seashell collection, most of which never saw the light of day. You may have such a set as well, particularly if you have been given one of those little baskets of seashells that seem to be a common bathroom decoration.

Cut five-inch lengths of string, double them, and knot them. Glue them into the open end of the shell so that it hangs point down; in the case of scallops, glue unobtrusively to the hinge area. Tie a ribbon bow around the string where it meets the shell.

If you have a number of spiral shells of the same type and size, you can make stars. Arrange them on a table, open ends facing in, until you know how many will fit together. Carefully apply hot glue around the open edge of one shell and hold it next to its neighbor until the glue cools. Continue with the rest of the shells until the star is complete, gluing the loop into one of the joins. Tie ribbon around the loop.

Sand dollars are also fun, though fragile. (They are best found on the beaches around San Francisco in October if you can stand the cold; leave them in a bucket of diluted bleach for a week or so, then dry. Don't worry about getting all of the sand out. You can't.) Glue a loop into the hole on the backside, then anchor it with a spot of glue on the edge of the shell so it hangs straight. You can also use craft paint to follow the star patterns on the front; I suggest diluting it so that it looks like watercolor.

Tuesday, December 06, 2005

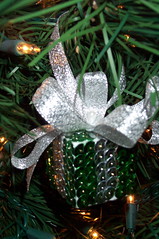
Sequin Present Ornaments

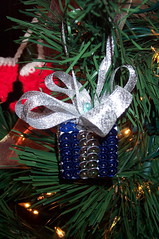
Blue Present

Sequin Presents
You will need:
Small cubes of foam, 1.5 inches
Colored sequins and silver or gold sequins
Metallic ribbon, 1/2 inch
An ungodly number of sequin pins (really short)
Longer decorative pins with pearlized balls on the ends (make sure they are not longer than the cube)
Krazy Glue or its equivalent
Thimble

This is pretty simple. You take one color of sequin, red or green or blue or whatever, and a contrasting metallic sequin color. You take one sequin pin per sequin and apply the pins to the cube. The metallic sequins are the "ribbon" around the present, so a typical side of sequins will look like this:

R R G G R R
R R G G R R
R R G G R R
R R G G R R
R R G G R R
R R G G R R

The top and bottom have crosses, as though the ribbons cross.

R R G G R R
R R G G R R
G G G G G G
G G G G G G
R R G G R R
R R G G R R

When the entire cube is be-sequinned, take a length of ribbon of at least sixteen inches, and the long decorative pin. Fold one end of the ribbon over and stick the pin through it; the cut end should be toward the point. Make loops of about two inches by sticking the ribbon on the pin; use the last five inches to make a loop for hanging. Push the pin with its bow through the top of the present. Once the look is to your satisfaction, pull the pin partway out, put some crazy glue on the part right next to the cube, and push it back in. It should bond in a minute or two; after that, you can hang it immediately.

Present On the Tree

Monday, December 05, 2005

Christmas Traditions

I grew up in a large family, with multiple siblings and a Nana in the house. The necessities of that large family dictated several traditions, and then there were the ones we came up with on our own. I've already mentioned St. Nicholas Day, but there are other traditions worth observing:

—We never traveled. When your relatives all live in distant states, it isn't worth the hassle OR the recriminations ("You went to their place LAST year!")
—We went to Midnight Mass, which, of course, we young ones slept through.
—We were not allowed to open presents until Nana came out, and we were not allowed to bother her. Present opening therefore took place after eight or nine. (If you still have very small children, like toddlers, consider creating a reason why they can't open presents at 4AM. Make it an absolute prohibition, such as 'We can't open presents before breakfast and breakfast WON'T happen until the paper's been read' or some similar reason. Lie if you have to.)
—We received presents from our siblings, our parents, our Nana, and the Grinch. The Grinch's presents were usually silly.
—Stockings were not opened until after dinner. My parents reasoned that Christmas was a bit of a letdown after all of the presents were opened; the late opening of the stockings was a way to ease that feeling. Stockings had chocolate, small tchotchkes, and the like; nothing special, but fun.

Later on, other traditions accrued:

—Trolling for lights. The phrase is of my own coinage, and has been adopted by the family. It's not like I ever did more than simple bait fishing.
—Christmas wasn't always on Christmas. My sisters, who had waitressing jobs right after graduation, usually had to work on Christmas. My mother finally got sick of their being unable to come for Christmas and declared that she was making Christmas a day late, since neither had to work that day. Several years thereafter had arbitrary Christmas days.
—The water fight. It started when someone gave my father a SuperSoaker, and everyone else had little squirt guns in their stockings. Usually this was the guys' tradition, mainly because it was only the people who wanted to participate. Then one year my dad received a crossbow...
—Christmas bowling. This one was entirely accidental. My mom was looking for something to do one Christmas when one of my sisters had to leave early (and we had to open the stockings early as well.) She decided we could take advantage of the open bowling alley. We used silly pseudonyms, cried out "GOOOOOOOOAAAAAAALLLLLL!!!!" like World Cup announcers, and had a very silly time. The next year, we asked when the bowling was, having decided it was a tradition, much to my mother's surprise.

Sunday, December 04, 2005

Decorating Your Tree

This seems really self-evident, but only to those who have always done the decorating.

The first thing you need to do before you start decorating is ensure that the tree is stable. The last thing you want is to have a fully-loaded tree fall over, particularly on top of you. If at all possible, the tree should be away from the wall so that a person can get all the way around.

When decorating, it is a good idea to start with the lights. Before you even think about unwinding the strands, plug them in! It's better to find out which ones work before you wind them around a tree. Put non-working strands aside; there are methods for fixing them but just deal with the working strands to begin with. Run an extension cord to the tree. You might even choose to run the cord up the trunk and have the plug at the top. There's two types of serial plugs for Christmas lights; one is end-to-end and the other is plug-to-plug. Know which ones you have and plan before you string.

There's two methods of stringing lights. The first is the circle around the tree method; one starts at the top (or bottom) and winds the strands around the tree. End-to-end strands are ideal for this. The second is the branching method, a method best suited to plug-to-plug strands. Each branch is wound in lights starting from the trunk; on an artificial tree, careful planning can mean that the lights are stored on the branch itself.

The type of tree you have will determine the style of decorations you can put on the tree. Some trees have weak branches; they are best suited to lightweight ornaments. Some trees are open and can have ornaments all the way to the trunk. This type of tree is particularly handy when you have a surplus of ornaments. If you only have a few, however, you might want to go with a dense tree that you can't reach into.

Before decorating, you should consider the hazards your tree will go through. Rambunctious dogs? Perhaps the antique glass ornaments should stay in a box. Curious cats? Leave off the tinsel - it's irresistable and interferes with their digestion. Small children with sweet teeth? Restrict the candy canes to the upper branches alone.

The heaviest ornaments go closest to the trunk and the bottom as a practical consideration. On artificial trees, hang them in open spots to mask the metal trunk. One trick that is useful to know is that ornament hooks are bendable; crimp them onto the branch and the likelihood of them falling (or being knocked off) drops considerably. Light ornaments can go towards the top and the ends of the branches. Don't forget to decorate the back and sides; it is usually fairly obvious when the decorations are reserved to the front.

When all the decorations are in place, carefully move the tree back into position by kneeling and pushing from the base. (If the tree is light enough, lift it just a bit while someone steadies the top.) Plug in the extension cord and bask in the glow.

Next Up: Make Your Own Ornaments!

Saturday, December 03, 2005

On Picking a Tree Part III

Part 3: Cut Trees

The traditional Christmas tree has a history going back to Germany. Trees were originally hung upside down from the ceiling - a tradition that is sporadically springing up today. The tree became popular in the Anglosphere when Queen Victoria was shown with her family around one. Nowadays, Christmas trees are grown especially for the purpose, with over 75% of American trees grown in Oregon. (Some Oregon forests are creepy, like somebody used a clone stamp on the hillside. Rows upon rows of perfectly matching trees.)

Is a cut tree right for you? Consider:

Pro:
-Tradition.
-That real pine smell.
-The ability to pick exactly the shape, species, and size you want that year. I have yet to see a good-looking artificial Noble Fir.
-At the end of the holidays, it goes to the curb, and you don't have to worry about storage.

Cons:
-Allergies. (I know I keep harping on this point, but I have a sister-in-law who is deeply allergic to pine.)
-Fire hazard.
-Needles.
-The need to keep watering the tree.

When you purchase a cut tree, or cut your own, the first thing you need to do upon arriving home is to stick it in a bucket of water in a cool place, such as the garage. Your stand should be large and sturdy and preferably weighted; set it up near where you will be putting the tree but away from the wall. (If you put a piece of tarp or glide coasters underneath it, it will be easier to move near to the wall when you need to.) Using a sharp hacksaw, first cut any low branches that will be in your way - you should have six to eight inches of trunk clear at the bottom at least, and as much as a foot. Then cut a new cut across the trunk, because the initial cut will have dried out. Immediately immerse this cut in water and do not let it dry out; this will prolong the life of your tree.

For the stand water, you can purchase a plant life extender such as those that come with bouquets; however, all you really need is water, and lots of it. A cut tree drinks up to a gallon of water every day. Consider watering twice a day - more if you have pets who are drinking from the stand. A well-watered tree is less of a fire risk as well. (They used to put candles on the tree. Real, honest-to-goodness candles.) And it drops fewer needles.

Next: Decorating Your Tree

Friday, December 02, 2005

On Picking a Tree Part II

Part 2: Living Christmas Trees

A living tree, or a potted tree, is another option for those seeking a tree. They range in size from desktop to person-height, and have many of the advantages of both the fresh-cut tree and the artificial tree. Consider:

Pro:
-You don't kill a tree.
-That fresh pine scent.
-Works for years.
-You get greenery year-round.

Con:
-You have to take care of it year-round.
-After a few years, it loses its shape, sometimes drastically.
-After a few years it may also need to be repotted or planted.
-Allergies.

The most common live tree that I've seen is the Italian Stone Pine. From experience, my family calls it the Italian Stoned Pine. When small, its branches have single needles, like a fir tree; as they get larger, they have longer twinned needles, like the pine that it is. One such tree that we had lost its shape so dramatically that it looked like it fell over drunk; we tried to plant it but I'm afraid it died.

Italian Stone Pines get enormous if not checked; if you want to plant it outdoors you had better have an acre or two of property to shade. I'm not kidding.

You may also see some "trees" that are shaped herbs in pots, such as rosemary. These will only be good for the one season unless you are a bonsai master, but otherwise you've got a nice rosemary bush.

Some stores and catalogs sell pre-decorated live trees. That is an ideal gift for someone who loves Christmas but is unable to decorate; sometimes you can see them in nursing homes. They tend to sell out, so if that sort of gift appeals to you, don't delay.

Next: Cut Trees

Thursday, December 01, 2005

On Picking a Tree Part I

Part 1: Artificial Trees

The artificial tree has come a long way from its weird metal beginnings. Of course, you can still get an aluminum or pink Christmas tree if you know where to look, but in general, they can well mimic the real thing.

Is an artificial tree right for you? Consider the following:

Pro:
-It's hypoallergenic, doesn't shed, and is fire-resistant.
-It doesn't need to be watered.
-It's designed to be both stable and lightweight.
-You can set it up at the beginning of the month and know it will still look good at Christmas.
-Pricewise, you recoup your investment within five years (less for smaller versions.)

Con:
-You have to store the thing.
-Unless you buy a pricey one, there's still a good chance it will look fake.
-Again with the price: you may not be able to afford it.
-If you love the smell of Christmas trees, fake pine just doesn't cut it.*
-Like many other things, artificial trees are subject to the vagaries of fashion; right now there is no such thing as "medium" size (big and small exclusively), trees tend to be slim rather than full, and pre-lit trees are almost the only choice.

Pre-lit trees have their own pro and con. If you hate stringing lights, that's a pro, but if you would rather have flexibililty, that's a con. Pre-lit trees are best for those who have little time or inclination to decorate, such as seniors. My personal take is that I am leery of something that could break and be difficult to fix.

Artificial trees in general tend to be good with small children who are at the age of sticking things in their mouths, because while they still will gnaw on the tree, they won't be able to swallow it, anyway. They're also ideal for people who have lots and lots of ornaments because the strength of the branches is a given, as opposed to that of a real tree, and ornaments can be stuck deep within the branches without worrying about getting pricked by the needles (or throwing the ornaments out at the end of the season.)

When setting up an artifical tree, be sure to read the directions. For instance, many trees with flexible wire branches ask you to curve the branches upwards. This makes the tree look much more realistic and fuller. If you don't read the directions, you might end up wondering why it doesn't look like the picture on the box. Be sure to rotate the tree while setting it up to make sure it looks symmetrical. And if it's not pre-lit, consider tying an extension cord to the center pole before you put any greenery on; it will give you a handy place to plug in the lights.

As you can probably guess, I grew up with artificial trees, so I never missed the real ones. And as for the pine smell of Christmas, that smell makes me think of camping instead.

Next up: Potted Trees

*My personal theory as to why they never get the smell of pine right is that they deal with the needles exclusively, rather than understanding that "pine" is a gestalt of the needles, the bark, the sap and even a faint hint of dry dirt.

Thursday, November 03, 2005

Egg Toast

One thing I have noticed about L.E. Modesitt's books is that reading them will, over time, make you hungry.

The reason is simple: in every novel of his, particular attention is paid to food. He is very concerned about what people eat. In the fantasy novels, travel food is emphasized, with army food pointed out from time to time. His Recluce books lead to cravings for olives and cheese. It's also evident that he has, at some point, had a bad experience with cactus or something like it; in two of his series, he has a food substance that is good for you and really, not very tasty. Both "quilla" and "prickle" tend to be strongly disliked by his protagonists.

But he's also fond of the good meals and the unique meals, and of slipping in some regional specialty seemingly made of fire in the role of spice. And his science fiction novels also feature food, both the good and the bad.

In the Corean Chronicles, a recent series, one of the common breakfast choices is "egg toast." That rang a bell, but I couldn't quite figure out what it was. (I've been tired.) When it hit me, it was a supreme moment of "Well... duh."

Egg toast is what a non-American might call French Toast. Because French Toast is an inaccurate term for one of the most delectable breakfast concoctions ever created.

Aaaaaand... it's one I've never managed to get right. I either end up with heavy, eggy bread that tastes like... well... eggs, or I end up with this weird soggy mess, or something that is basically bread with a light coating of egg. But I've mastered the omelette (after much trial), so I decided to surf online recipes and find out just exactly where I'm going wrong.
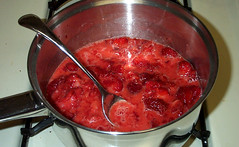
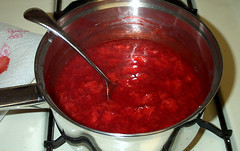
And, hmm, that doesn't seem to help, as they disagree. One says to soak the bread "for just a few seconds" while another states that you dip the bread until it is well saturated. They say nothing about the bread, which is of supreme importance. And not a one of them mentions a prime ingredient of diner French Toast, which is the scattering of powdered sugar across the surface. So I will present to you the basic French Toast recipe, which should work for you... because it works for everybody but me.
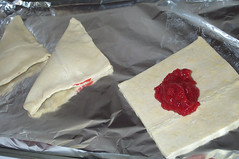
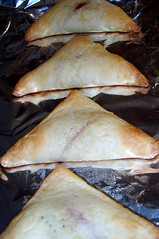
Maybe you can come and cook it for me someday.

You will need:
Day-old or older bread (stale is what it was originally used for!), preferably thick
Eggs
Milk
Vanilla
Cinnamon
Nutmeg (optional)
Butter, maple syrup, powdered sugar, or other toppings of your choice including preserves or fresh fruit
Griddle, nonstick, or seasoned iron pan

Crack some eggs into a shallow bowl. Add a little milk and a droozle* of vanilla, as well as cinnamon and nutmeg to taste. Whisk them together until they are blended but don't keep going after that! Soak the bread according to your own design, making sure that both sides are coated.

Cook the bread over medium-low heat until the first side is firm, then flip and do the other side. Serve with whipped butter and a dusting of powdered sugar, warmed maple syrup on the side.

Or serve with fresh fruit. Or use raisin bread (Costco has a WONDERFUL raisin bread that tastes as raisin bread should, not like Sunmaid's lifeless variety.) Or use your egg toast to make a jam sandwich.

This is particularly good with a side of hash browns. The salty potato crunch is a perfect counter. And don't forget the orange juice.

So— tell me, just what am I doing wrong? Answer in the comments, and anyone who has worked at a diner will earn a virtual cookie by telling me what temperature they run the griddle at. Medium? Hot?

Also consider these recipes, variations on the theme:
Almond French Toast
Applesauce French Toast
Prepare-it-the-night-before Baked French Toast

*Liquid measurements go up in size like this: mist, spritz, squirt, drizzle, droozle, glug, shot (actual measurement). That is not a family phrasing and I have no idea why I came up with it, but it works for me.

Campfire Cooking

It's summer, and for summer my mind turns toward camping. My family used to camp all of the time, and the scent of forest is a sure path to memory.

And I still remember some of the recipes from when we went camping. Admittedly, in most of the West you can't have open flames right now, but there are still some places that allow fires in firepits, and quite honestly, this is not backpacking cooking. This is campsite-with-parking cooking. This is also the first night of camping, or at most the next day.

To begin with, you need a good hot bed of coals. Not charcoal, coals. Do you know how to build a fire? Remember that before you build your fire, you should have the means to put it out nearby. This means a shovel and a bucket of sand or water at the minimum. When you do put it out, you should get it to the point where you can stick your hand in the coals.

If it seems like I'm harping on this, please realize that the current state of our forests is best described as "tinderbox." I've also fought a very small wildfire that threatened to become a very large one if it weren't dealt with, and with people who didn't know how to put out a fire. If you're going to play with fire, know what you're doing.

That said, a contained fire is good for cooking in. Many campsites have stone- or metal-lined firepits available, and the simple task of raking duff— the loose soil that is mostly made of decomposed pine needles— and branches away from the pit is more than sufficient for safety. The most efficient type of fire for getting coals is a teepee-style fire. See the link above. It burns hot and fast and gets you a bed of coals within twenty minutes or so.

Then it's time for your Dutch oven. A Dutch oven is cast iron and is designed to sit on and in hot coals. If you're going camping with one, try and find a sturdy iron hook to go with it. Some fireplace pokers work well for this job. The appropriate hook should be able to catch the handle of the pot itself, as well as being able to catch and hold the handle of the lid in a steady fashion.

If you've put the coals on top, you don't want to accidentally dump them in your food.

On a practical note, if you really don't want to clean the inside of your Dutch oven, a lining of aluminum foil works farily well, especially if you press it firmly against the sides to smooth it out. Be careful when serving so you don't end up with foil slivers in your food.

Okay, now for the recipes. First off comes a wonderful heart-attack, the kind of thing that sounds appalling unless you've been hiking all day at altitude, in which case it sounds wonderful.

Corned Beef Hash
You will need:
Two large cans or four small cans or corned beef hash, with one can that has had its label removed and the outside of the can washed well
Fresh eggs (you can have eggs in a cooler without ice for one or two days without risking anything if you bought them the day you left)

Put the corned beef hash into the Dutch oven and smooth out the top. Use the bottom of the cleaned can to press regular depressions into the hash. Carefully crack an egg into each depression. Cover the oven and place it in the coals. Put coals on top to cook faster. Check starting ten minutes after placing in the coals; your dinner is done when the eggs are firmly set and the hash is warmed through. It's overdone if the edges are black. Try not to do that.

Serves about six, fewer if there are teenagers involved.

Pineapple Upside-Down Cake
You will need:
4 Tbsp. butter
1 cup brown sugar
1 can pineapple rings (you may have extra)
Maraschino cherries (optional)
Yellow cake mix
Water
Eggs
Oil

Melt the butter in the Dutch oven. Run it up the sides; it will help the cake to release. Sprinkle the brown sugar across the bottom. Carefully place pineapple rings across the bottom as evenly as you can. Save the juice. If using cherries, place one each in the centers of the pineapple rings.

Mix the cake according to the box directions except substitute pineapple juice for up to 2/3 of the recommended amount of water. Pour over the pineapple rings; cover the oven and place in the coals. Cover the oven with coals; bake for about 45 minutes or until the top of the cake springs back when touched.

If you've brought a cake tester along, more power to you. However, err toward the slightly undercooked side, as iron holds heat and your cake will still cook a bit once removed from the heat.

Remove the oven from the coals, crack the lid, and let it sit for ten minutes. Run a spatula around the outside edge to loosen the cake. Put parchment paper or foil along the inside of the lid, replace the lid, turn the oven upside-down and pull off the bottom. With any luck, the cake will come out in one piece, but remember that fragments are always tasty too!

There are hundreds more Dutch oven recipes at sites such as Byron's Dutch Oven Recipes, Scoutarama.com, and the MacScouter.

However, I don't want you to think that a Dutch oven is the ONLY way to cook camp food. Cooking on a stick is always a popular method, though please please please do NOT use a stick you just found unless you are entirely certain of what it comes from. There are several plants whose wood can impart poison to cooked food, the most dangerous of which is oleander, a popular decorative shrub which is highly toxic and can be fatal. Use toasting forks for your marshmallows. My family's favorite trick was to use bamboo branches from our home stand; when the end got inevitably sticky, you could cut it down with a pocketknife and it would still be slim and smooth.

But perhaps a better trick for kids is a hobo pack. Yes, I know that's very un-PC of me, but that's what it's called.

Hobo Pack
You will need:
Thick aluminum foil (or a double or triple thickness of the thinner variety)
Ground beef
Potatoes
Carrots
Onion
Salt, pepper, and other favorite spices

This is the simplest trick of all. You put your beef and your thinly-sliced vegetables all muddled together on the foil, spice it, wrap it in the foil, double the edges and crimp them, and place in the coals. They'll cook in a short period of time— check after seven minutes, but they should take about fifteen to twenty minutes.

Baked Potato
Prick lots of holes in the potato. Wrap in aluminum foil and cover with coals. The potato will bake in forty minutes to an hour, depending on its size. Serve with salt, butter and pepper.

And for dessert, there's the Ice-Creamless Banana Split
You will need:
Aluminum foil
Bananas in their peels
Chocolate chips
Mini marshmallows

Take a knife and carefully cut a slit in the banana through the peel. Stuff it with chocolate chips and mini marshmallows. Wrap the business in foil and place in the coals; it should be done in five to ten minutes or until the child's patience runs out.

Huh. I want to go camping.

Wednesday, November 02, 2005

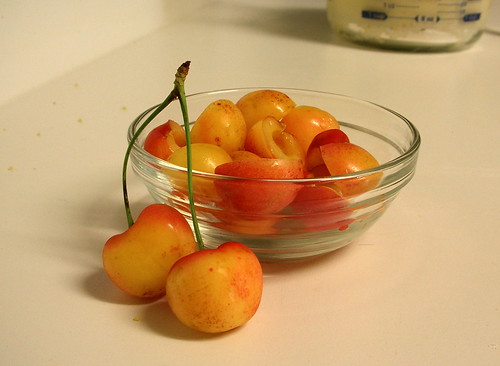
Rainier Cherries

Rainier cherries, $3.99 a pound at the local chain.

Rainier Cherries

They are lovely cherries, with a much different flavor than Bing cherries, less intese and more plummy. But not quite plums, either. Eat them straight if you like.

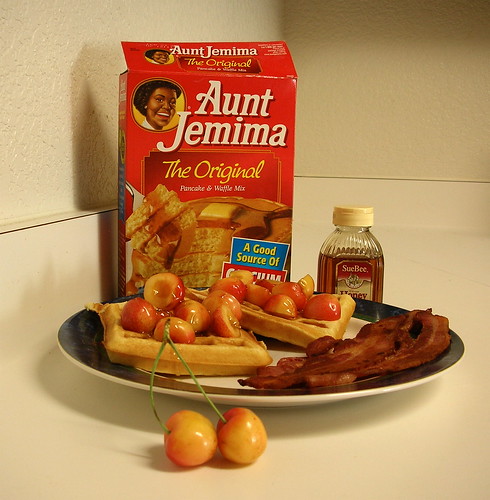
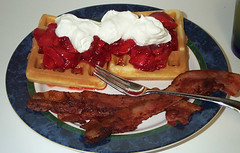
Or... and this was my inspiration last night... slice them up and have them with a little honey over waffles.

Breakfast

Oh, yeah.

Tuesday, November 01, 2005

Reverse-Engineered Salad

Today was one of those days where you run around a lot to very little purpose. In short, I was told to load a van, drive home and change into nice clothes, drive back (did I mention it's a fifteen-mile drive?) and help out with a photo shoot... and it turned out that I wasn't even necessary, since the second setup was having problems and we turned out to not need it anyway.

What I got out of it was a lot of drive time and a fairly nice convention-center lunch. With a salad. In a takeout box with chopsticks.

It seemed pretty simple but somewhat unconventional. So here's my attempt to reconstruct it.

You will need:
Small cucumber (preferably under an inch and a half in diameter)
Daikon radish (preferred in Japanese cuisine; try an Asian market)
Kelp (no... really)
Rice wine vinegar
Shrimp, cooked and ready to eat, then chilled

Slice the cucumber and the daikon radish very, very thin. If you've got a mandoline or slicer-dicer or whatever they call it, use that. You want slices of no more than a millimeter or two. Chop the kelp into little pieces. In a shallow bowl, soak them in rice wine vinegar for five to fifteen minutes. (I am fairly sure that you could leave them soaking from morning without damage, but let's call that good.)

Serve in small portions with shrimp on top. Rice wine vinegar has a gentler flavor than white vinegar, so serve with something that complements a faintly bitter taste.

Monday, October 31, 2005

We Attack the Mayor With Hummus

You will need:
A food processor
Canned garbanzo beans
Tahini paste*
Garlic
Olive oil
Lemon juice
Water, salt, and pepper

*If you do not have tahini paste, substitute peanut butter. Real peanut butter, the kind where the ingredients list consists of peanuts, and possibly salt. Thin it with a little sesame or olive oil and the taste will be virtually identical to the tahini paste. It will, however, set off nut allergies where tahini will not. This is VERY important (d'oh!)

In the food processor, combine one can of drained garbanzo beans, about two tablespoons of tahini paste, minced or powdered garlic as desired, and a couple of droozles of olive oil. Blend until smooth, at which point you will be able to determine how much water to add to give it a proper consistency. Add in lemon juice and then gradually add salt and pepper to taste.

If you like, consider adding roasted red pepper or black olives to the mix, or separate your blend into sections and do all three types.

Eat with pita chips, which are also quite easy to make.

You will need:
Baking sheets
Pitas in abundance
Olive oil, preferably in a spray bottle or squirt bottle
"Italian seasoning" spice
Kosher salt

Cut the pitas into wedges, and separate the sides. With the insides up, lightly coat with olive oil, then sprinkle spices and salt on top. Bake at 300º for ten minutes or less, when chips are golden brown. Experience tells me that a darker brown is still tasty but rougher on the teeth.

Sunday, October 30, 2005

Not a Middle Eastern Dish

The other night, I was hungry. When I get hungry, I don't think so well. I knew we had plenty of ingredients on hand but I wasn't quite sure how we should put them together. (I had been thinking we were going to have burritos, but the pack of tortillas was one short!)

So I asked Rob, and he came up with the following:

Couscous (1 box)
Half of a small tube of sausage
Bouillon cube (chicken in this case)
Onion
Olive oil

In a microwaveable dish, put the amount of water required on the box of couscous. Drop in the bouillon cube; float some olive oil on top. In general, coucous comes with a spice pack so stir that in as well. (If it does not, you'll want to add in a little salt and pepper— lemon pepper's a pretty good blend— and maybe a few other pork-friendly spices of your choice.) Microwave the water until just boiling, then dump in the couscous and cover.

Slice up about a quarter of a yellow onion and drop it in with the sausage. Fry until cooked, then stir in to the couscous. Serve immediately.

It occurs to me that you could do quite well by throwing in some sliced green apple. Or perhaps roasted red pepper or cooked tomatoes. Mmmm.

Serves two very hungry people or more moderate appetites of four.

Saturday, October 29, 2005

Snickerdoodle Drink

I don't believe I've posted this before. It's the sort of thing you come up with when you work in a café and you're really, really bored.

You will need:
Milk
Chocolate syrup, dark for preference
Vanilla syrup
Almond syrup
Cinnamon
Nutmeg
Whipped cream

I made this with a steamer wand. You can heat the milk in the microwave but be very very careful to not boil it.

Heat the milk until just shy of boiling. Add in chocolate syrup until the color is nice and dark. Yes, you can make this with hot chocolate mix but it isn't as good and is often too sweet. Then you add 1/2 measure of vanilla syrup— this varies by brand, so a "measure" is what you'd put into a drink to make a flavored latte— and 1/4 measure of almond syrup. Stir in some cinnamon and nutmeg, then top with whipped cream and dust that with cinnamon.

And by the way... don't make this with skim. You're only fooling yourself if you do.

Friday, October 28, 2005

Danish Puff Coffee Cake

You will need:
bottom—
1 cup flour
1 cube butter or margarine
2 tbsp. water
1/4 tsp. baking powder

top—
1 cup water
1 cube butter or margarine
1 tsp. almond flavoring
1 cup flour
3 eggs

glaze—
1 1/2 cup powdered sugar
2 tbsp warm water
1 tsp. almond flavoring

Bottom: Cut butter into 1 cup flour and baking powder until well blended. Sprinkle with water; mix with fork (or pastry blender.) Divide in half; pat dough into two long strips, 3x12 inches, on ungreased cookie sheet 3 inches apart.

Top: Combine water and butter; bring to a boil. Add flavoring and remove from heat. Quickly beat in the flour with an electric mixer. Make sure there are no lumps. Add the eggs one at a time, beating vigorously after each.

Cover your pastry strips with this mixture, spreading over the sides and ends. Bake about 60 minutes at 375º until crisp and golden brown.

Glaze: Mix it; spread on the coffee cakes while they are warm. Sprinkle with chopped almonds if so desired.

Thursday, October 27, 2005

Frikadeller

I should mention that while my mother-in-law has this lovely meatball recipe, her usual method of making meatballs is to go to the frozen food section of the supermarket and get the Armour brand.

You will need:
1 lb. lean ground beef
1/2 lb. lean ground pork
1/4 cup flour
1 tsp. salt
1/2 tsp. pepper
1 small grated onion
2 eggs
1 cup milk
4 tbsp. butter or margarine

Mix the first six ingredients. Add eggs, milk, and butter. Form into eight patties [I thought these were meat BALLS] and fry in butter until brown. Turn down the heat; cover and cook for another half hour.

This goes really well with mashed potatoes.

Wednesday, October 26, 2005

Aebleskivers

My recent trip to Oregon featured a breakfast of the all-too-addictive aebleskivers. They're little sweet pancake-waffle balls that you break open and serve with jam, a legacy of Junction City's Scandahoovian heritage.

I asked my mother-in-law for the recipe, and she replied that a certain church cookbook she'd given me had the recipe. So I got home, had a look, and went to my husband to ask "which one?" After he'd stopped laughing (because how many places would have a single church cookbook featuring more than one version of an obscure recipe?) he told me his mother probably used neither of them, but her own arcane style. So here's a combined version of the recipe, with some notes along the way.

You will need:
An aebleskiver pan (which has seven semi-circular depressions in it.) This has to be a heavy-duty pan as a cheap pan will cook unevenly.

All recipe variants denoted by / ; use either the ingredients before the slash, or the ones after, not both.

2 cups flour
2 cups milk/2 cups buttermilk
2 tsp. baking powder/1 tsp. baking powder and 1 tsp. baking soda
1/4 tsp. salt/1/2 tsp. salt
2 eggs, separated/3 eggs, separated
1 tbsp. sugar/2 tbsp. sugar
1/2 tsp. almond flavoring/applesauce
Melted butter or shortening

Beat the egg whites until stiff. Beat the yolks, then add sugar, salt, and milk/buttermilk. Add the flour, almond flavoring, and baking powder/soda. Fold in the beaten egg whites.

Heat the aebleskiver pan until hot. Drop some butter/shortening into each depression and fill 2/3 full with batter. The second recipe requires you to drop some applesauce onto the dough (carefully). As bubbles form in the balls (like with pancakes), turn with a knitting needle or fork. Keep turning until aebleskiver is spherical and brown on all sides; if you are using the knitting needle you can use it to test for doneness.

Serve hot, with maple syrup, powdered sugar, or by breaking it open and filling it with jam. Very addictive.

Rob notes that this is essentially a fancy soft waffle, so if you'd like to experiment, try a waffle mix and cut down the wet ingredients (water & oil) by a third, substitute some applesauce, or add some sugar.

Or just go to Junction City's Scandanavian Festival, held every August, and buy the danged things.

And because you're all dying to know, it's pronounced "Ay-ble-skee-ver."

[Comments copied from old blog]:
Alena made this comment,
I bought a pan that I have been told is an aebleskiver but it isn't round at the bottom, it is flat, but round edges. In other words, it would make more of a pancake shape than a donut hole shape. It is only (at most) 1/2 inch deep. Is it still an aebleskiver pan?

Bernadette made this comment,
Probably not, but you could make silver dollar pancakes in it with the aebleskiver recipe and I bet it would still taste good!

Stephanie made this comment,
hello, my family is from denmark and Aebleskivers have always been something that we've always eaten. the more traditional Aebleskiver is the first one that was post without buttermilk and instead of 2 eggs, use 3 eggs and we also use 1/4 tsp. almond flavouring and 1/4 tsp. pure vanilla extract, no imitation though! another thing i noticed is the recipe doesn't say to put melted butter in the recipe... i always put 4 tbsp. of melted butter in my batter, and i also put butter inside the Aebleskivers when they are done with either blackberry preserve or raspberry preserve. so, try it with the extra egg and the almond and vanilla and the 4 tbsp. of melted real butter, no margarine! one last thing, the recipe doesn't say to quarter turn the aebleskivers, when i was a kid my mother would let me turn and the first time i tried i had tried turning all the way over and not quarter turning and they didn't turn out right... so, now you quarter turn and make sure you do it about 20 seconds after they go into the hot pan, you don't want to wait too long or there won't be enough batter that is still wet to go all the way around in each quarter turn. :) if you want to let me know how they turned out, or if you have questions or anything, you can email me at stephie_pie@hellokitty.com

Monday, October 24, 2005

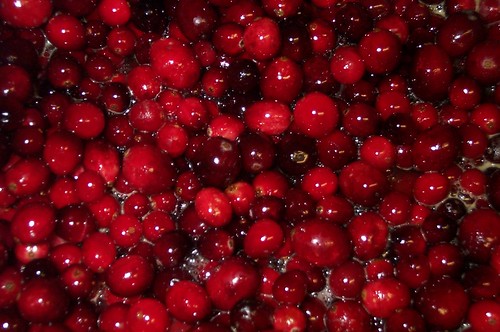
Bernadette's Perfect Cranberry Sauce For Those Who Think They Hate It

I am always surprised when I find out how many people don't like cranberry sauce. They've usually only been exposed to the canned variety, which I like anyway, but which is kind of boring all by itself. They also don't seem to realize that it is called cranberry sauce for a reason, and that it is meant as a spread for turkey. (It works especially well with slightly dry turkey.) Anyway, the recipe for basic cranberry sauce is appallingly simple, and goes like this:

1 cup water
1 cup sugar
1 12oz. pkg of cranberries
Put water and sugar in a saucepan and bring to a boil. Add cranberries and reduce heat to low boil; cook until all of the cranberries have popped, stirring gently. Cool before serving.

That's it. That's everything. That's all that silly canned stuff is: sugar, water, and cranberries. If you want a jellied version, you strain it while it's warm and you're done.

That's just screaming out for improvement...

I've been playing around with this for years, and have come up with a modular version that you can adjust to suit your family's tastes. My own version is listed below, and is perfect for those who think they hate cranberry sauce for one reason:

They've told me so.

Liquid group:
Filtered water
Orange juice
Cranberry juice
Raspberry juice
Pomegranate juice (only use as one quarter of the liquid amount; other three quarters should be water or other liquid)
*Apple juice

Sugar group:
White sugar
Brown sugar
Natural sugar
Honey
Molasses (use sparingly)

Fruit group:
Cranberries (use full amount)
Mandarin bits
*Apple bits
*Dark Raisins

Spices:
Cinnamon
Nutmeg
Allspice
*Cloves
*Ginger


Follow the above recipe with the liquids making a total of one cup, the sugars making one cup (go easy on the honey, though), and the fruit bits tossed in as extras to the cranberries. Dust with the spices of your choice. To keep the cranberries from splattering all over your stove, gently pop them with the back of the spoon against the side of the pot.

The *starred ingredients go together but not with the other ingredients. Don't go mixing apples and oranges.


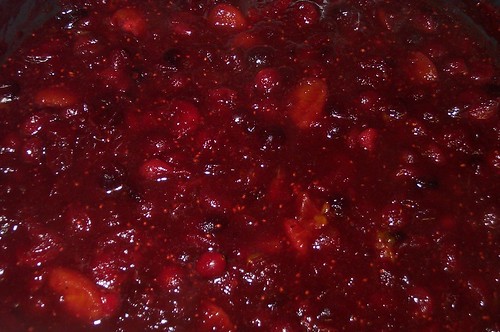
My personal recipe is a double amount; one cup water, one cup orange juice, one cup white sugar, 2/3 cup brown, various squirts of honey and molasses, two packages of cranberries, lots of cinnamon and a couple of dashes of nutmeg. Mandarin sections added as available; remove as much pith as humanly possible. Like I said, I've had people tell me they hate cranberry sauce but like mine, so take that as you will. I personally eat the leftovers for breakfast. And on waffles. Mmmm. Cranberry waffles.

Anyone who says you should use salt or pepper (!) is a heathen.

This year I'm making it for my work, as well as for my family. More leftovers for me!

Sunday, October 23, 2005

Blame It On the Vinaigrette Salad Redux

Last year, I created a recipe called Blame It On the Vinaigrette Salad. Since then I've had the chance to refine it, and so the newly perfected recipe needs to make its debut.

You will need:
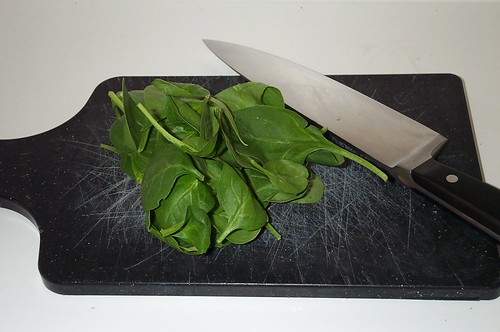
Spinach leaves
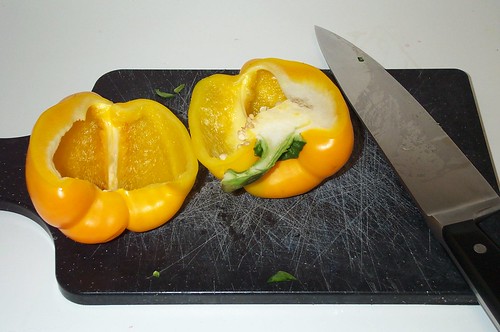
Bell pepper (I prefer yellow, red, or orange; check what is in the best shape in the produce dept.)
Celery (optional)
Mushrooms (optional)
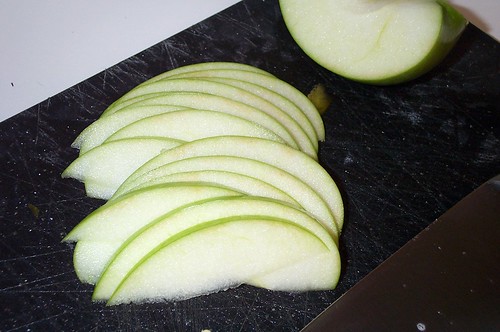
Tart green apple (such as Granny Smith)
Green onion
Pomegranate seeds in season OR dried cranberries (cherry or orange flavors work well)
Crumbled feta cheese (vitally important to keep the salad from being too bitter)
Walnuts
Raspberry -Walnut Vinaigrette


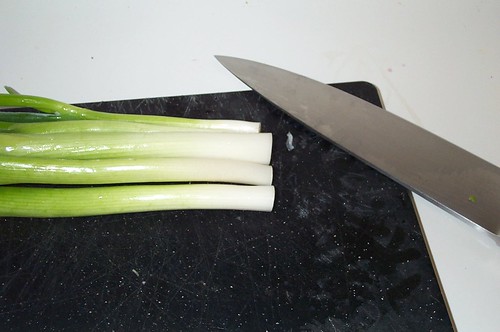
Chop


Cut


Slice


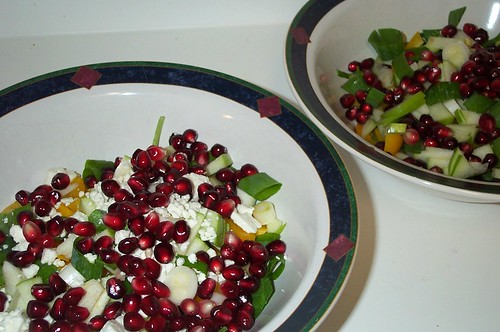
Add


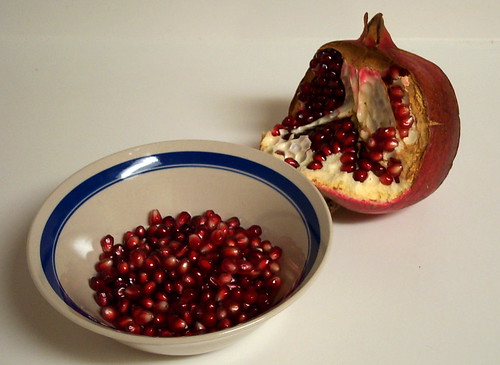
Seed


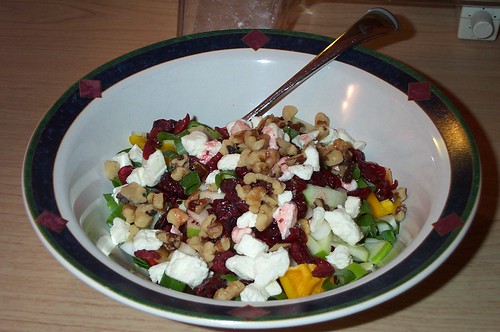
Needs walnuts


Alternate variety with cranberries.

Saturday, October 22, 2005

Smoooooothie


New blender means new opportunities. Judging from the prevalence of beverage bars with whipped drinks, smoothies are the most popular game in town.

The rules of the game are simple:
1. Make sure your blender can handle ice. The smell of burning machinery is very unappetizing.
2. Always, always, always put the liquid in first. This also helps to keep the machinery death away. (Though perhaps a $400 blender from Blendtech wouldn't do that, it's still a good idea. Yes, that price would be worth it. That's a VERY good company.)
3. A quick rule of thumb— which may need a little tweaking— is to have enough liquid (and binders) to fill your glass halfway, and then enough loose ice cubes to fill your glass completely. Obviously, this breaks down when you don't have pre-mixed concentrates to work with, but it's a good fudge factor.

Then all you need is a little imagination. I've been experimenting, and here are a couple of recipes I've been playing with.

Berry Smoothie
You will need:
1/2 cup orange juice
1 single serving berry or cherry yogurt
Frozen strawberries or raspberries (frozen cranberries are optional)
1 tsp wheat germ (optional; good for helping to lower cholesterol)

Dump the ingredients in the blender in the order given; pulse blend on high until smooth. (The frozen berries are in lieu of ice, and work very well.)

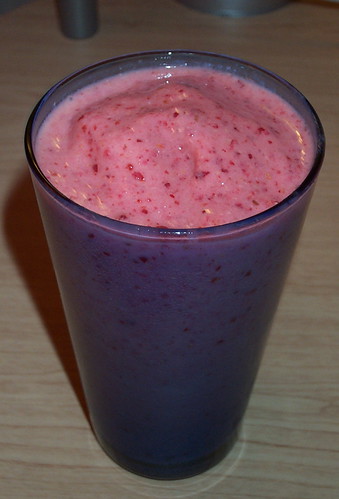
Black and Blue Smoothie
for those days when you've banged your elbow and stubbed your toe
You will need:
1/2 cup lemonade, or water and lemon juice
1 single serving of blueberry yogurt
Frozen blackberries (frozen nectarines or skinned peaches optional)
1 tsp wheat germ (optional)

Again, blend in the order given. Add frozen berries if it seems too thin. It is best to always go from thin to thick; most blenders won't blend in new liquid very well.

Mocha Smoothie (approximate; I don't drink coffee)
You will need:
1/2 cup strong coffee or two shots fresh espresso
4 oz. milk (about one glug, or if using an espresso machine, top off the shot)
1/2 single serving plain or vanilla yogurt (if you have yogurt powder, substitute 1/4 cup and add it last)
16 or 20 oz. glass of ice
Chocolate syrup
Ground cinnamon (optional)

The amount of chocolate necessary is dependent upon you. The cinnamon is good for drawing the bitterness from coffee. (The things you learn as a barista.)

Friday, October 21, 2005

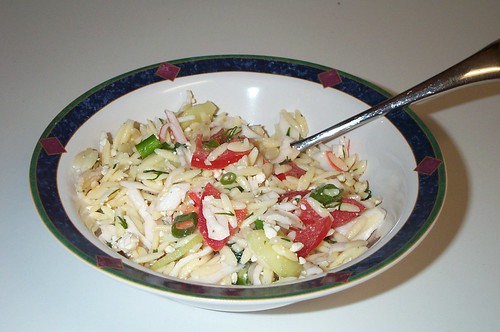
Orzo Salad

My sister served this salad to us this summer, and I have been dutifully begging for the recipe ever since.


You will need:

1 & 1/2 boxes orzo
1 & 1/2 bunches green onions, chopped
3/4 lb feta cheese, crumbled
3/4 cup chopped fresh dill
7 tbsp fresh lemon juice
6 tbsp olive oil
3 lbs uncooked medium shrimp, peeled, deveined, or 2 lbs imitation crab

1 & 1/2 English hot house cucumbers, quartered lengthwise, cut crosswise into 1/4 in pieces (regular cucumbers can be substituted)
2 baskets cherry tomatoes, halved
1/2 hot house cucumber, sliced into rounds
Fresh dill sprigs

Cook orzo in large pot of boiling salted water until just tender, about 10 minutes. Drain. Rinse with cold water to cool; drain well. Transfer to large bowl. Add green onions, feta cheese, chopped dill, lemon juice and oil; mix well. Cook shrimp in large pot of boiling salted water until pink and just cooked through, about 2 minutes. Drain, rinse with cold water to cool; drain well. Mix into salad. Season to taste with salt and pepper. (Can be prepared 8 hours ahead. Cover and refrigerate.)

Mix cucumber pieces and 3/4 of cherry tomatoes into salad. Transfer to clean large bowl. Arrange cucumber slices and remaining chery tomato halves around edge of bowl. Garnish salad with dill slices and serve.

Thursday, October 20, 2005

Hummus

Gah! Before you know it, life catches up and leaves you behind on entries!

Oops.

Well, I've been craving hummus lately. It's quite tasty, you know. My favorite is Trader Joe's version with their pitas... but since this is a recipe, perhaps I should tell you how to make it, hmmm?

Via Cooking.com

You will need:
1 3/4 cups garbanzo beans (chickpeas)
6 cups water
3 garlic cloves, peeled
1 1/4 cups tahini paste
1 teaspoon dried cumin
1 teaspoon chili powder (or to taste)
1/3 cup lemon juice
2 tablespoons olive oil

Pita bread, cut into wedges

Wash garbanzo beans (chickpeas) and soak in cold water for 24 hours. (Obviously, canned garbanzo beans will not need this preparation step.) Place garbanzo beans, with their soaking liquid, in a large saucepan and bring to a boil. Simmer for 2 hours, skimming off any debris that may surface. Drain garbanzo beans, reserving 1/4 cup liquid, and refresh in cold water.

Process until smooth. Add garlic, tahini, spices and salt, lemon juice and olive oil. Reprocess and adjust seasoning. Serve drizzled with additional olive oil with pita wedges.

Personally, I just spread the pita with hummus and eat it like a pizza.

Wednesday, October 19, 2005

Cornish Pasty

British food is sometimes unfairly maligned. Partly that is because many of the basic British meals were incorporated into American cuisine (such as eggs and bacon, or sandwiches) and sometimes because the names just sound funny.

Cornish pasties are the simple, filling meals that laborers used to take to their jobs. I encountered pasties again at the Renaissance Faire and decided I had to both look it up and share with everyone. The following recipe is a conglomerate of the many recipes I encountered on my search.

For the crust, you will need:
4 cups plain flour
1 1/2 cups butter or lard (or shortening)
1/8 tsp salt
8-10 tsp water

Mix butter and flour until rough lumps form. Add salt; gradually add water until dough forms ball. Put aside in cool place.

Or do the shortcut, frozen pie crust. Turn the crust over on waxed paper; remove tin as soon as it releases from dough. Let it thaw and flatten gently.

For the filling, you will need:
Beef— ground beef, chuck steak, round steak, any except stew beef
Raw potato
Raw rutabaga or carrot or celery or mushroom
Small onion
Parsley or green onion (optional)
Salt and pepper
Bouillon cube (optional)
Butter

Cut meat into small pieces. Slice potatoes and other vegetables into small pieces no more than 1/2 inch across; dice onion finely. Roll out dough to 1/4 inch thick, cut out circles and moisten edges. Layer vegetables, then meat; repeat but do not overfill (or you get what happened to me, a messy pasty. Oh well.) Sprinkle with spice (and bouillon if using), dot with butter.

Fold the pasty and crimp the edge (mine got away from me). Brush with egg. Bake at 400º for 15 minutes, then lower to 350º and bake until golden— 10-15 minutes if small and up to 40 for large pasties.

Pasties, of course, have a large variance in fillings. I've seen it suggested that you try chicken, or parsley, shallots, spinach, egg, and bacon, or even the traditional pie apples and brown sugar. On site even suggested having a savory side and a sweet side, marked so that you can eat from dinner to dessert in one pasty. (If you do that, make sure the two sides go together, such as sausage and potato with apples and cinnamon.) Once you get good at them (I'm not), you can prebake them and wrap them up to take to work.

That is what they're designed for, after all.

Tuesday, October 18, 2005

When Couscous is Not Enough

The other day I really felt like having some couscous, but I was hungrier than that. I wanted meat, darnit. So here's the simple recipe I came up with to fulfill both longings.

You will need:
1 pkg couscous (listed at three servings); I used Garlic and Olive Oil blend, plus required ingredients for that.
1/4—1/3 lb ground beef
Green onion
Bouillon cube (about 1/3) or 'seasoned salt' with MSG
Salt and pepper to taste

Prepare couscous according to package directions after adding bouillon cube. (If you're worried about salt intake, leave out the bouillon cube and replace the required water with low-salt chicken, beef, or vegetable broth.)


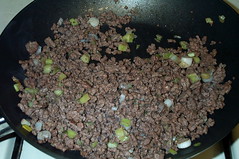
Chop some green onion into a frying pan with the ground beef;


fry over medium heat, stirring constantly, until browned and the fat is cooked away.


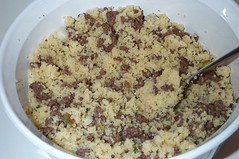
Fluff the couscous and stir in the meat;


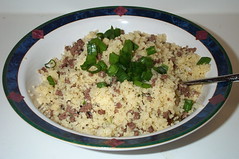
garnish with chopped green onion.


Serves 2-4 or one teenaged boy.

Consider cucumbers as a somewhat traditional side dish. Cucumbers with "greek" yogurt is the most authentic, but I'll let you get away with ranch dressing... as long as it's made from the mix packet and not from a bottle.

Monday, October 17, 2005

Sammich

I know you all are familiar with how to make a sandwich. I'm only posting this recipe because I just finished having one and it WAS SO GOOD that I had to share it with you.

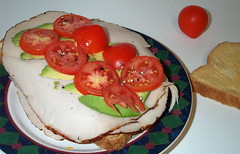
turkey cheddar tomato avocado sandwich what are you waiting for Yes, those are cherry tomatoes; that's what I had.

You will need:
Two slices of sourdough bread
A toaster
Mayonnaise
Dijon (or deli) mustard
Deli-sliced turkey (or leftover roasted chicken)
Tomato
Cheddar
Avocado (about 1/4 of one)
Salt
Pepper
Lettuce leaf (optional)

Okay, how hard is this, anyway? Toast the bread lightly, then spread with the spreadables, layer with the turkey, slice the cheese, tomato, and avocado and layer that, then lightly dust with salt and pepper.

So—very—good.

Sunday, October 16, 2005

Plain Old Pasta

Most people these days have gone through a few "poor times" when the choice of meal was peanut butter sandwiches or ramen. You can get ramen at eight for a dollar on sale— for as long as you can stand it.

However, just because it's inexpensive doesn't mean it has to be horrible. The perfect pasta is inexpensive as well as long-lasting, a cupboard staple that I've never quite left off loving.

You will need:
A BIG pot. Even— dare I say it— a pasta pot.
Pasta of your choice; I prefer thin spaghetti or wacky mac multicolored pasta
Salt
Pepper (optional)
Parmesan or Romano cheese*
Olive oil (optional but highly recommended)
Oregano (optional)

*This is one of the few grocery items where I will not compromise. If you MUST get dried parmesan, get Kraft, since the generic brands are nasty. However, I have found that both for amount and for cost, fresh parmesan is far cheaper than dried, and when tightly wrapped in plastic wrap, will last for months. (Though I will admit that I haven't wrapped it and just left it in the fridge; that's months with regular use until used up.) Months of two or three pasta meals a week for under $10. There's no beating that cost.

The first thing that you do is fill your pot with water, about an inch and a half below the rim. I know that cooking directions say that certain amounts of pasta need certain amounts of water; I am telling you to always err on the side of too much water. Extra water does not hurt the pasta. Boil the water over high heat. There is only one reason to put oil in your pasta water and that is to keep frothing down. A simpler way to keep it from boiling over is to turn the heat down when it starts to boil.

Add your pasta. If you don't know how to measure a proper amount of spaghetti, a typical serving is between a nickel diameter's worth and a quarter diameter's worth (if you're really hungry.) You get better with practice. Add in an indeterminate amount of salt— again, don't worry about adding too much, chances are you'll pull back long before it becomes a problem.

Now here's the pasta secret: You can only tell if it's done by tasting it. Don't throw it against a latex surface, because a) that's gross and b) that's a standard of doneness that went with the era where "bland" was a good description. The cooking time listed on the package will give you a general guideline, but you're going to have to eat some. You're looking for al dente, which means "to the tooth", which is darned near impossible to describe but in reality, you want to have pasta that isn't crunchy but still has to be chewed. If it's sludge, that's unappealing and you've gone too far.

When the pasta is cooked, drain it through a colander and serve it into bowls immediately. (I have learned over the years that plates and pasta are an unnecessary combination. We have several large shallow bowls that are perfect for this sort of thing; a lot of modern stoneware has wide salad bowls that are ideal.) Drizzle some olive oil over the pasta and toss it; add pepper and oregano to taste and toss. Then grate your parmesan with a fine grater over the top— it doesn't take a whole lot— and, once again, toss. Then eat.

If you are a smart shopper, this is a meal that is literally a couple of quarters per person. A little more than ramen, true, but infinitely preferable.

Saturday, October 15, 2005

Chocolate Bread Pudding With Spiced Cream

My sister-in-law, Niki, sent this recipe along. I think I confused her when I said it tasted like a soggy good brownie; I meant that "soggy" as a description, not a slam. (I still haven't come up with a better way to put it because "moist" doesn't even begin to come close, and yet "soggy" sounds, well, wrong.)

For the pudding, you will need:
1 tsp unsalted butter
2 cups half and half
2 cups semisweet chocolate chips, about 1 pound
4 large eggs
1 cup firmly packed light brown sugar
1/2 tsp ground cinammon
1/8 tsp nutmeg
1 tsp pure vanilla extract
1/4 cup Grand Marnier
8 slices day old white bread (or just store bought sliced white bread), crusts removed and cut into 1/2 inch cubes (about 4 cups).

Preheat the oven to 350º F. Grease a 6 cup loaf pan with butter.
Heat the half and half in a large saucepan over medium heat. When it comes up to a gentle boil, whisk in 1 cup of the chocolate chips, whisking constantly unil the chips have melted and are incorporated into the cream. Remove from heat.
Whisk the eggs, sugar, cinnamon, nutmeg, vanilla and Grand Marnier together in a large mixing bowl until very smooth. Add the egg mixture to the cream mixture and mix well.
Add the bread, incorporate thoroughly and let the mixture sit out for 30 minutes, stirring occasionally.
Pour half the mixture into the prepared pan. Sprinkle the top with the remaining chocolate chips. Pour the remaining bread mixture over the chocolate chips.
Bake until the pudding is set in the center, about 55 minutes.
Let cool for 5 minutes.
To serve, cut the pudding into 1 inch thick slices. Top with spiced cream.

Spiced Cream
1 quart heavy cream
1/4 cup granulated sugar
1/2 tsp cinnamon
1/4 tsp nutmeg

Beat the cream with an electric mixer on high speed in a large mixing bowl for about 2 minutes. Add the sugar, cinnamon, and nutmeg and beat again until the mixutre thickens and forms stiff peaks, another 1-2 minutes.

Friday, October 14, 2005

Peach Melba

Summer is the time for sun-warmed peaches.
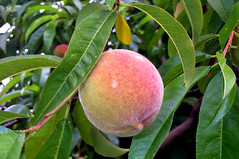
peach
Alas, my parent's peach is ailing, and though it produces hundreds of fruits, they are all tiny little suckers, with barely a half-inch of flesh around the pit. (This is a result of bark beetles; one can prevent an infestation by the simple expedient of a ring of Tanglefoot sticky resin painted around the trunk. This also prevents aphid-farming ants.) So what do you do with hundreds of little tiny peaches?

Use them in recipes, of course.

N.B.: You can easily remove skins from peaches by cutting an X in the bottom and immersing the peaches for 30-60 seconds in boiling water. This step is entirely unnecessary with very fresh peaches as the skin slips off easily.

Peach Melba

You will need:
1/2 cup AND 1/4 cup granulated sugar
1 cup AND 1/4 cup water
2 tblsp fresh lemon juice
4 medium peaches, pitted, peeled, and sliced (about 2 cups of tiny peach slices)
2 cups fresh raspberries (or 2 cups frozen berries, thawed)
1 tsp vanilla extract
Vanilla ice cream (or frozen yogurt)
Fresh mint leaves for garnish (optional)

In a large skillet, combine 1/2 cup sugar, 1 cup water, and lemon juice. Mix well, bring to a boil over medium heat, and cook for five minutes. Place peach slices in skillet and reduce heat to low; cover and cook, turning once, until tender (about six minutes.) Drain the peaches and discard the liquid; place peaches in small bowl, cover with plastic wrap, and chill.

In a blender or food processor combine raspberries and remaining water. Process until smooth and strain to remove seeds (unless you don't care about them.) In a small bowl, mix raspberry purée with remaining sugar and vanilla; cover and chill for ten minutes. Put it all together— peaches go in bowls, top with vanilla ice cream, drizzle the raspberry sauce on top, and garnish with the mint.

Thursday, October 13, 2005

Arroz Con Pollo With Apples

I was up in Seattle for my brother's birthday, and my sister-in-law served us a marvelous meal.

You will need:
2 large Granny Smith apples
8 boneless, skinless chicken thighs
1 tsp kosher salt
1 tsp black pepper
6 tbsp olive oil
1 green pepper, coarsley chopped
1 yellow pepper, coarsley chopped
1 medium onion, diced
3 cloves garlic, minced
1 14.5 oz can diced tomatoes
1 tbsp paprika
1/4 tsp red pepper flakes (or more to taste)*
1 cup fast cook (minute rice) long grain rice (N. uses minute brown rice)
2 cups chicken broth

*Quite obviously, if you want to turn up the heat, use chipotle chiles, jalepeños, or habañeros.

Quarter, core and slice the apples into 1/4 inch thick pieces, set aside. (Do not peel.) Season the chicken with the salt and black pepper. In a large (deep) skillet, heat the olive oil; add the chicken and cook four minutes per side or until it is golden brown. Remove the chicken from the pan but save the oil. Cook the bell peppers (and hot peppers, if using), onion, and garlic in the oil until tender, about ten minutes. Add the tomatoes and apples to the pan; cook eight to ten minutes longer. Add the paprika and red pepper; stir well and add the rice. Stir over the heat for two minutes; add the chicken broth and bring to a boil.

It seems to me that if your skillet is not big enough to hold all of this, you could heat a large pot and dump the whole shebang into that when it starts getting too full.

Reduce the heat to medium-low, arrange chicken over everything, and cover. Cook for twenty minutes or until liquid is absorbed; serve with sour cream.

Wednesday, October 12, 2005

Cabbage and Coleslaw


This is the lovely cabbage plant. See the delicate folds of green.


This is the cabbage you get from the plant. But what do you do with cabbage?

Well, there's always corned beef and cabbage, or boiled cabbage at Christmas, but it's summer, so cabbage means coleslaw!

I asked my dad for his recipe, since I'm not a big coleslaw fan myself, but his isn't much of a recipe per se. He takes the prepackaged coleslaw mix or bottle and cuts it with mayonnaise and vinegar, because the mix is too sweet otherwise. Do that to taste.

Simply Recipes has a coleslaw recipe that has both mayo and non-mayo versions. The non-mayo version has a lot of sugar in it, though.

You will need:
Cabbage, either green or purple or both
Carrot
Green onion

For Mayo version:
Mayonnaise
Yellow mustard
Pepper

For Non-mayo version:
Rice vinegar or white vinegar
Sugar
Salt and pepper

Starting with a head or half a head of cabbage, thinly slice the cabbage until you have approximately 4 cups (not packed) of sliced cabbage. Julienne a half of a carrot. Thinly slice a couple of green onions.

For the mayo dressing version, add 3 Tbsp mayo, 1/2 teaspoon of yellow mustard and mix in with the cabbage, carrot, and onions. Add pepper to taste.

For the non-mayo version, add a couple tablespoons of rice vinegar. Sprinkle with sugar, salt, and pepper to taste.

Diana's kitchen has North Carolina Coleslaw.

You will need:
1 pound finely shredded cabbage
1 medium onion, finely chopped
1 medium green pepper, finely chopped
1/2 cup vinegar
1/2 cup sugar
1/2 cup salad oil
salt
pepper
celery seed

Put cabbage, onion, and green pepepr in a large bowl.

In a saucepan, combine vinegar, sugar, and salad oil; heat to boiling. Immediately pour over vegetables in the bowl. Add salt and pepper and a generous sprinkling of celery seed, to taste. Toss to coat vegetables. Refrigerate coleslaw for several hours or overnight for best flavor.

And Cook's Recipes has Tangy Coleslaw

You will need:
1/2 large head cabbage, shredded
2 large carrots, shredded
1/2 cup finely chopped green pepper
2 tablespoons finely chopped onion

Dressing:
1/4 cup sugar
3 tablespoons vinegar
2 tablespoons vegetable oil
1 teaspoon celery seed
1/2 teaspoon salt
Freshly ground pepper to taste

In a large bowl, combine cabbage, carrots, green pepper and onion.
In a jar with with a tight-fitting lid, combine dressing ingredients; shake well. Pour over cabbage mixture and toss well. Cover and refrigerate for 4 hours before serving.

That seems to have a lot of sugar in it, though.

Starting from that, one can get the basic idea of a coleslaw. You start with your cabbage, and you add shredded carrot, onion, and perhaps bell pepper. That's your base. For your dressing, you can either go the mayo route or the vinegar and oil route, though I've heard that a mayo and vinegar combo usually works out well. You add some salt and pepper (and sugar if you must), then flavor the way you like to. (I think the mustard would add a nice kick, and would harmonize well when served with hot dogs.)

Of course, you're asking why I'm posting coleslaw recipes when I admit I do not eat it myself. Well, I saw the cabbage my dad pulled out of the garden and I was inspired. And if you invite me over, I'll even try your coleslaw recipe.

Tuesday, October 11, 2005

Strawberry Shortcake and Belgian Waffles

Start off with your adaptable sliced strawberries. You will need:
Strawberries (go figure)
Small, sharp knife
Lemon juice or orange juice
Granulated sugar
Plastic lidded container

Wash your strawberries and hull them (remove the stem area.) Very fresh strawberries will, of course, need little removed.


Add your juice.


Sprinkle sugar on top; this not only draws the juice to make the strawberries syrupy but enables the mix to last a few days longer in the fridge.


Put the lid on your container and shake and then pop in the fridge.


So first, you've got your strawberry shortcake to make. Sure, you can use premade angel food cake or pound cake (I prefer the latter), but where's the fun in that? For a biscuity shortcake, try the following recipe.

You will need:
1 3/4 cup all-purpose flour
2 tblsp sugar
1 tblsp baking powder
1/2 tsp grated orange peel
3 tblsp unsalted butter cut into pieces
3/4 cup skim milk

Preheat oven to 450º and grease a baking sheet. Sift together the flour, sugar, and baking powder in a large bowl, then mix in the orange peel. Use a pastry blender or two knives to cut the butter into the flour mixture until coarse crumbs form. Stir in the milk until a soft dough forms. Roll out the dough on a lightly floured surface to 1/2 inch thickness. Cut out biscuits with a cutter or the rim of a glass. Re-roll the trimmings to cut out more biscuits. Bake on the prepared sheet for 12 to 15 minutes, until golden. Cool slightly, then split horizontally and fill with strawberry mix and whipped cream.

One note about that whipped cream:
Do not use Cool Whip.
Okay, I used pound cake. But it's still good.

There is no earthly reason why a person who owns a hand mixer or a blender or even a food processor should be buying Cool Whip. Freshly whipped cream is so far superior and not even really expensive when you realize that 1/3 cup of whipping cream gives a generous amount of whipped cream for two people. Besides, then you not only leave out the preservatives, but there's other benefits, as I will point out in a moment when we do the Belgian Waffles with Strawberries.

You will need:
Belgian Waffle Mix (because, honestly, do you really need to make that from scratch?)
Whatever the mix requires
A waffle iron
Whipping cream

Prep your waffle iron according to manufacturer's directions and make up some waffle mix. If you have a toaster or toaster oven, I'd suggest making extras to stick in the fridge. They're better (and cheaper) than Eggos but they won't reheat well in a microwave. Start making them up.

Now, for the whipping cream. If you're using a hand mixer or hand blender, make sure you have a bowl with tall sides. Whip the cream until it is well and truly whipped, then keep going. You'll start getting some yellow undertones. The idea here is to whip this cream halfway to butter or maybe a little further. Every so often, clean your beaters with a spoon and stir the cream, since there will be less whipped areas around the rim.

Yes, you too can make butter. Isn't that cool?

Anyway, serve your fresh hot waffles with a generous serving of strawberry mix and very whipped cream on top. I would suggest a tall glass of juice on the side and maybe some bacon as well.

Monday, October 10, 2005

Chocolate Strawberries (and Lazy Fondue)

One of the pure joys of strawberry season is to have chocolate-dipped strawberries. They're not as hard as you might think, though you do have to prepare them sufficiently in advance so as to let them cool to room temperature.

You will need:
Washed, firm strawberries (as fresh as possible without exploding into juice when you handle them)
Chocolate of your choice (do NOT get melting chocolate, which just tastes waxy)
A double-boiler
Waxed paper

You put some water in the bottom pan of the double boiler, heat it to boiling, and turn off the burner. Put your chocolate in the top pan and let it just melt (stirring helps.) Add some cool chocolate to help bring down the temperature and stir it in. Exposing the chocolate to air is called "conching" and helps to give it a good taste and texture— but since you're using prepared chocolate, and proper conching takes days, don't worry about it. :) Then you dip the strawberries (using a spoon helps to coat them):

Place the dipped strawberries on waxed paper and let cool completely. If you put them in the fridge, you increase the chance of "bloom", which is the mottled surface that sometimes appears on melted and re-hardened chocolate. While unattractive, bloom is not in the least dangerous and can be gotten rid of by re-melting and mixing the chocolate. In fact, I used chocolate bars with bloom for coating these strawberries, and as you can see, they look great.


(Incidentally, that lighter chocolate of the somewhat unfortunate color is Symphony bars, extremely milk chocolate. It's what I had on hand. Dark chocolate is best for strawberries as the bitterness is a perfect foil for the sweet berries.)

If you are having trouble making the chocolate melt smoothly, I have been told that margarine (not butter!) can help the chocolate melt properly. I have never had trouble making the chocolate melt.

I have also been told that you can melt chocolate in the microwave. (Which makes sense, because melted chocolate bars were how they discovered the cooking applications of microwaves.) Be extremely careful if you try this, as chocolate gets very hot very fast, and do no longer than 30 second bursts, if that.

Now on to the lazy person's chocolate fondue. It's simple; you go on a picnic, you take your chocolate bars, unwrap them, place them in a sturdy container (not, I repeat, NOT one-use plastic containers)... and then you leave them in the car with the windows rolled up.

On an overcast summer's day where the temperature is in the 70s, a closed car in the sun can get over 160º in half an hour. And, of course, everyone knows how melted candy bars get in your pocket on a warm day, so why not take advantage of this fact? When it comes time for dessert, simply get the pot-o-melted-choc out of the car and dip your fruit and your cake in the melted chocolate. You could even do a reverse S'more and dip marshmallows in melted chocolate and sandwich them between graham crackers.

Dang. Now I want S'mores.

Sunday, October 09, 2005

Strawberry Tart, Tarts, and Pie

strawberries The California strawberry season has begun, and sometimes will last as long as July or August. Those of you who have yet to get strawberries take hope; your time will come.

The best strawberries are always the local ones. Strawberries are very delicate and even the trip to the store is enough to necessitate the picking and packing of not-quite-ripe berries. Your best bet is to find a little family strawberry stand at the side of a semi-rural road, especially one that is attached to a piece of land where they grow the berries.

Of course, there is a downside to these very fresh berries: You have to process them immediately. And by "immediately" I don't mean the next day; you can end up with moldy strawberries in a depressingly short time. However, it's not so bad, because there are things you can do to keep your strawberry wonders intact. One is to use this marvelously versatile filling recipe in any manner you please.

You will need:
1/2 cup granulated sugar
3 tbsp cornstarch
2 cups fresh strawberries (1 pint)
1/2 cup water (with caution; see instructions below)
2 tbsp fresh lemon juice

The first thing you do is to "hull" the strawberries, which means to remove the stem area. Storebought strawberries will often need the entire white top cut off but utterly fresh strawberries just need a tiny bit. I have a tendency to do a generous two cups because, well, strawberries are tasty.
a pint is two cups

In a handled saucepan, combine the sugar and cornstarch, and mix well. Add the two cups of berries and mash them.
mash them up well

Hmm. That seems really liquid (very fresh strawberries), so instead of the 1/2 cup water I will take the 1/2 cup measure, put the lemon juice in it, throw in some orange juice for fun, and barely top it off with water (scant 1/2 cup instead of full 1/2 cup.) Then you bring it to a simmer and stir until thickened, a half hour or more, while stirring so the strawberries don't stick to the pan and burn. Heck, get a book and read with one hand while stirring with the other.

stewed strawberries
Once the strawberries are stewed, stick in a lidded container and cool completely. This can last for week or two in the fridge due to its strong sugar concentration (the same thing that keeps honey from spoiling.)

If you'd like to make this into a tart, you will need:
1 cup all-purpose flour
2 tbsp granulated sugar
1/2 tsp salt
1/4 cup vegetable oil
3 tbsp plain yogurt
About 18 pretty strawberries, halved

In a large bowl, combine flour, sugar, and salt. Make a well in the center and stir in the yogurt and oil until the dough forms a ball. Flatten slightly; wrap in plastic wrap and chill for 20 minutes. Preheat oven to 400º F and grease a 9-inch tart pan. Roll the dough between two sheets of waxed paper into an 11-inch circle; press into tart pan. Pierce it with a fork and bake until golden, about 12 minutes. Cool on a wire rack.

Spread the berry mixture into the crust and arrange halved berries on top. Dust with powdered sugar and serve.

Or you can do the same thing with a frozen pie crust; prepare the crust according to the single-crust pie directions.

Perhaps you'd like to have little tartlets instead. Buy some puff pastry; carefully thaw one sheet and cut into squares. Spoon a big dollop of strawberry filling into the center; fold the pastry over and seal.

If you like, you can brush the tops with egg white and sprinkle with that big granulated sugar whose name I don't know. Bake according to package directions for 12-15 minutes.

Serve immediately or wrap up in aluminum foil for a packed lunch.


What else can you do with the filling? Try spooning it over French Vanilla ice cream. Mmm.